Setting Up Projects & API Keys: Complete Guide
ASO.dev’s Projects feature enhances organization by allowing you to group related applications within a single project.
This is particularly useful for managing apps with shared themes, such as iOS and Mac versions of the same app or those targeting a similar audience.
Project types
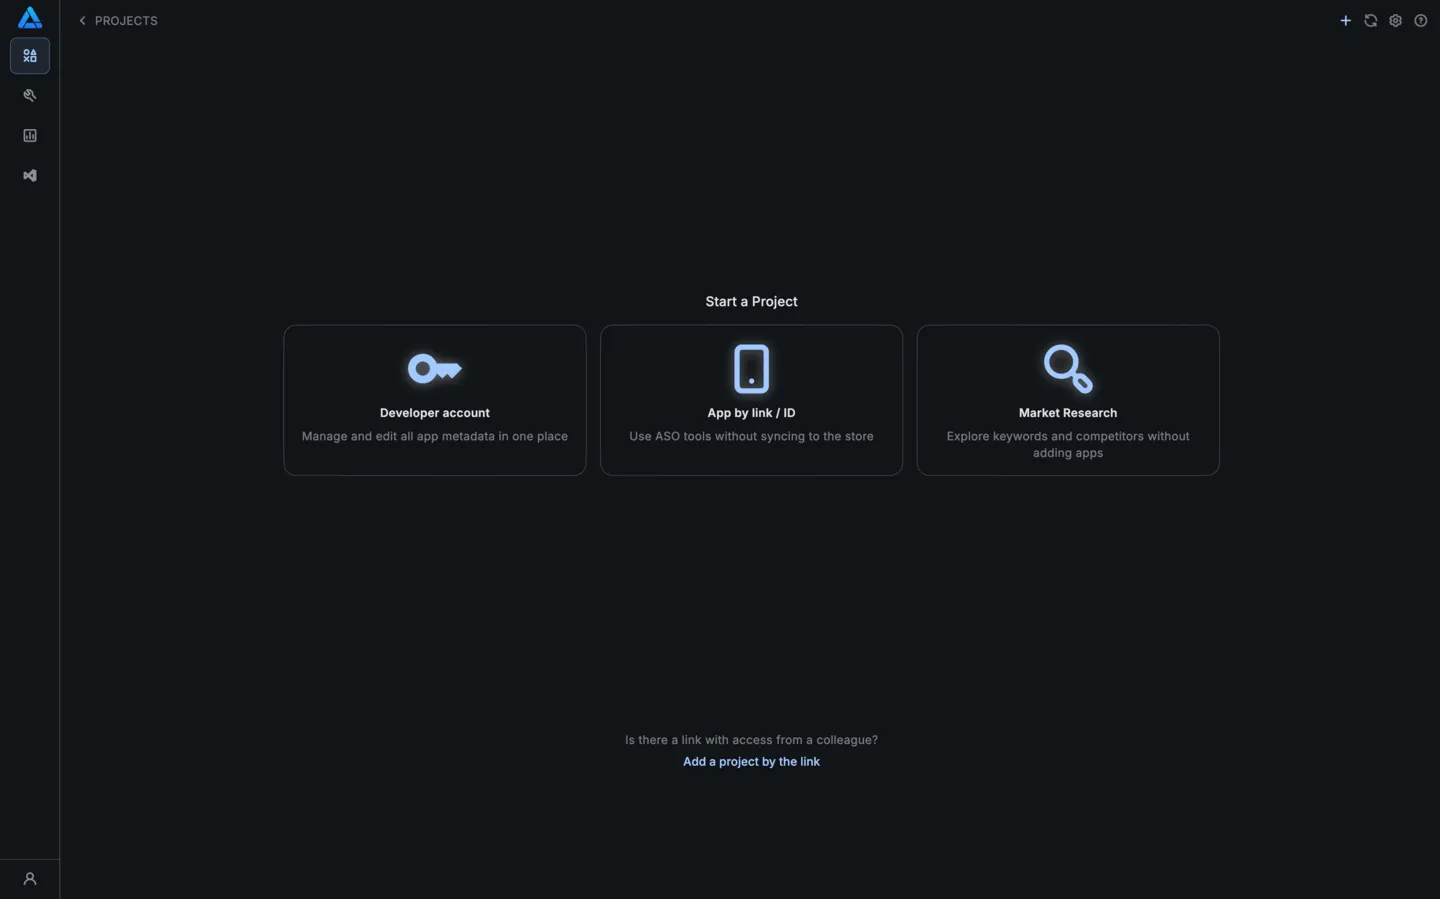
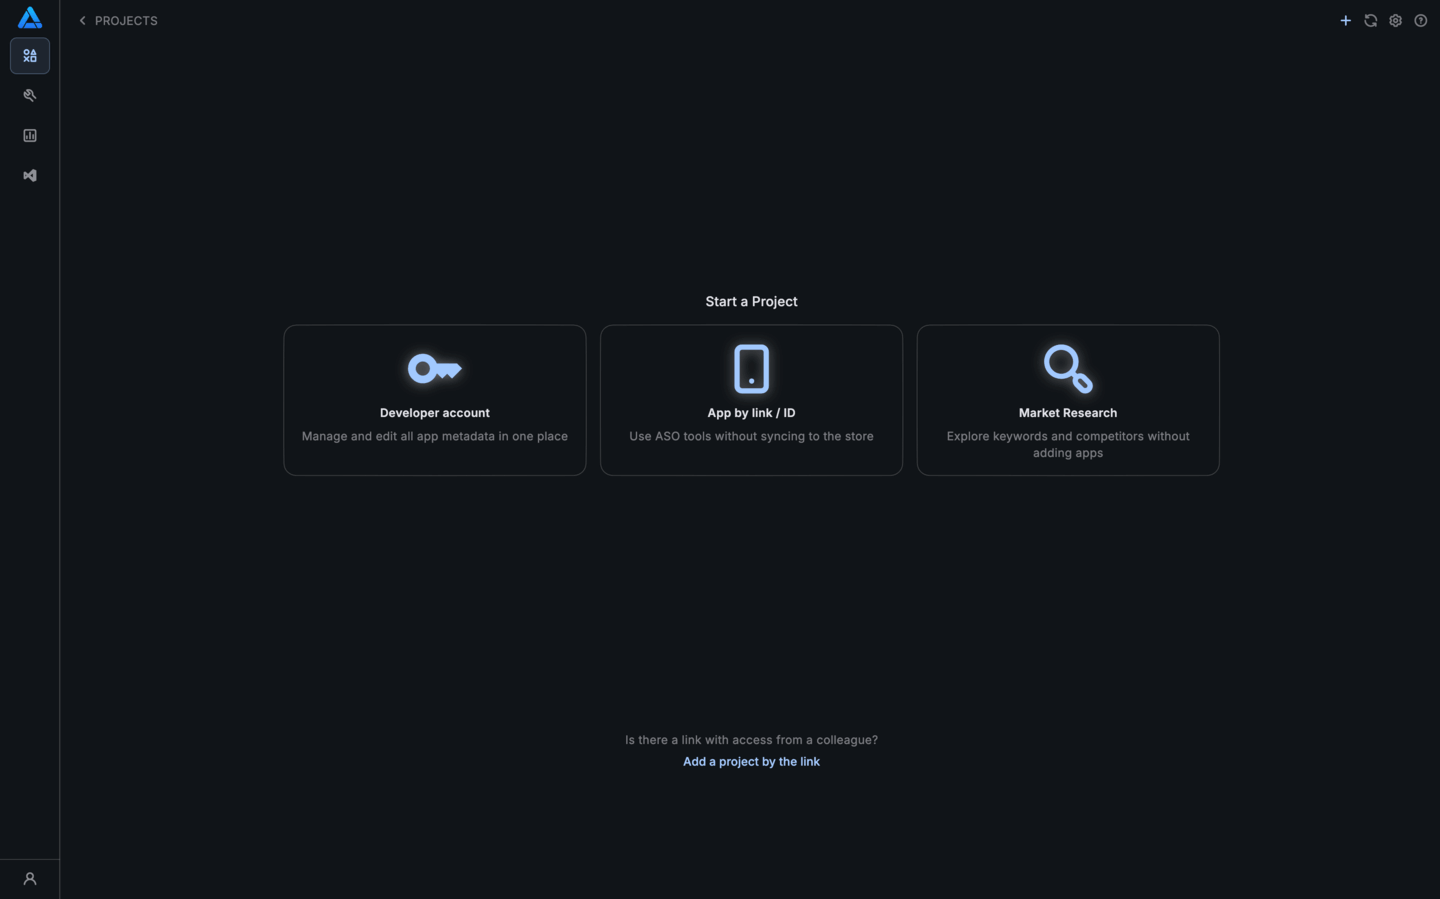
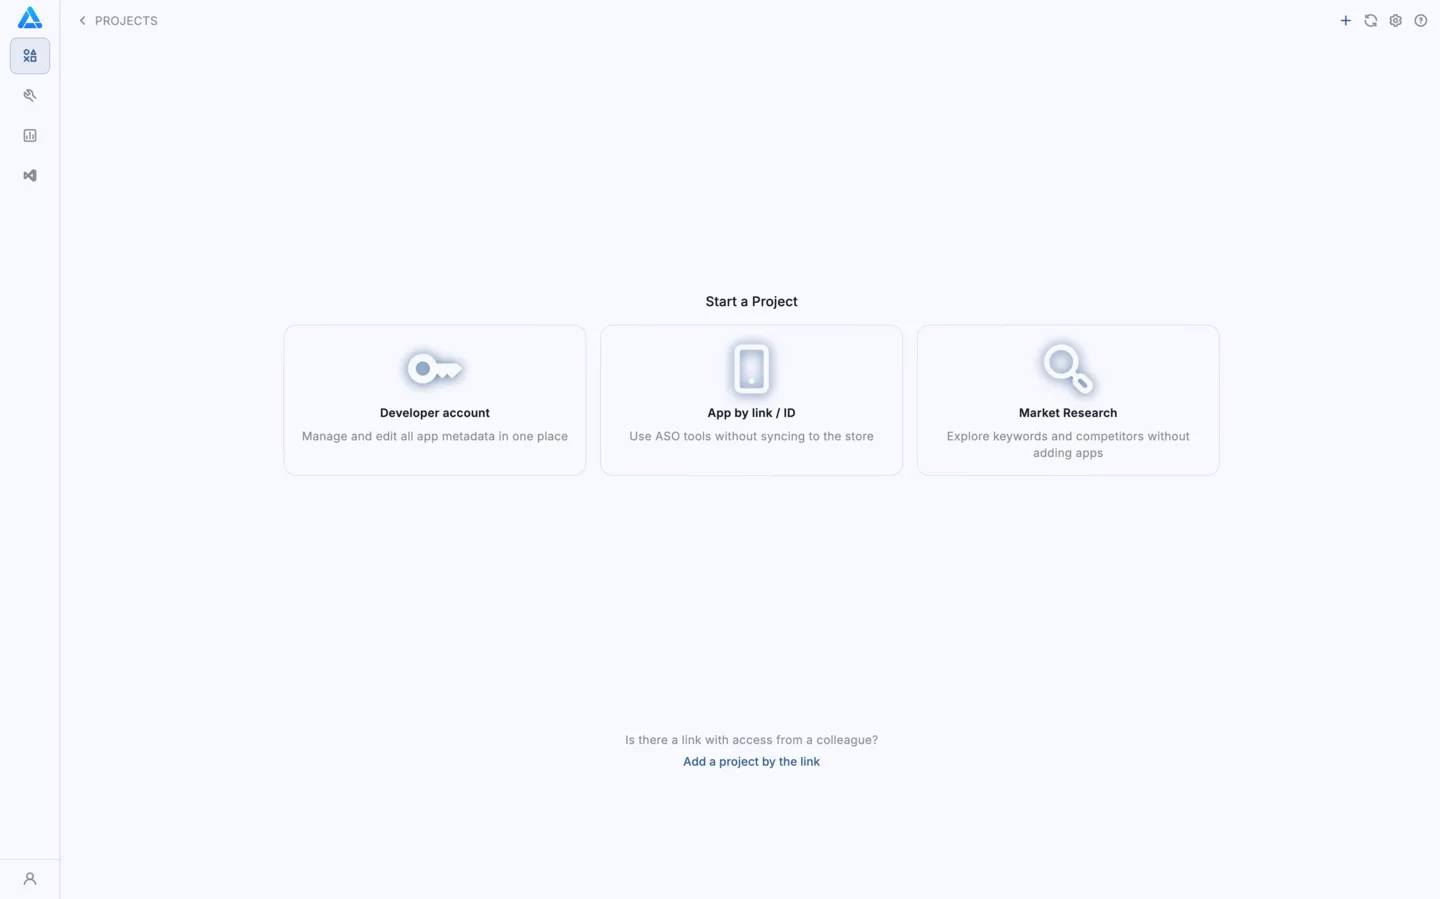
Section titled “Project types”ASO.dev offers three ways to create and manage projects for your App Store Optimization (ASO):
- Developer account (API Key)
Connect your App Store Connect API key for full access to manage and optimize metadata, keywords, reviews, and more. - App by link / ID
Use ASO.dev tools without syncing to the store.
Track keyword rankings and performance data for any app (not just your own) without syncing to the store.
Retrieve public metadata, edit locally, and generate a Fastlane script for developers to apply updates. - Market Research
Start without an app or category.
Explore keywords, competitors, and niches to discover new opportunities and insights.
Collaborate on Shared Projects: Work with your team by receiving access via a shared link or your email address.

What is an API Key?
Section titled “What is an API Key?”An API Key is a secure digital credential that enables direct access to data and app management in App Store Connect via the official API.
It enables automation of metadata, screenshots, and localization uploads, along with other tasks-removing the need for manual login.
There are two types of API keys available in App Store Connect:
Team API Keys:
- Designed for team members who need access to multiple apps within an organization.
- These keys allow broader permissions based on the assigned roles in App Store Connect.
- Ideal for managing apps at a team level, including metadata updates, analytics, and financial reports.
Individual API Keys:
- Intended for use with restricted access to specific apps.
- Permissions can be customized to grant access only to certain features, such as metadata editing, app management, or financial data.
- Useful for scenarios where access control needs to be more granular, ensuring users only interact with designated sections of App Store Connect.
- Permissions match the privilege level of the account to which the key is linked.
Features Requiring an API Key
Section titled “Features Requiring an API Key”If you choose not to provide an API key, access to certain metadata editing features will be limited.
The following features require an API key:
- Metadata Editor:
- Integrate directly with App Store Connect.
- Edit age rating.
- Select a build for submission.
- Submit your app for review or revoke the submission directly from the platform if needed.
- Current app keyword.
- Bulk Editor & Cross-Localization:
- Integrate directly with App Store Connect.
- Note: Viewing current app keywords is not available.
- Subscriptions
- Manage your app’s in-app subscriptions, localization, and availability.
- Control pricing for in-app subscriptions.
- Mass Screenshots and Video Upload:
- Upload screenshots and videos for all localizations.
- In-App Events:
- Manage your app’s in-app events, localization, and availability.
- Custom Product Pages (CPP):
- Manage your app’s product pages, localization of promo text, and media files uploads.
- Reviews:
- Manage your app’s reviews
- Answer to reviews
- Report to inappropriate reviews.
- Timeline:
- Review a history of all changes made to your app’s metadata.
- Access rights:
- Some sections offer partially restricted access due to API key requirements.
Project with an API Key
Section titled “Project with an API Key”Set Up Your API Key
Section titled “Set Up Your API Key”Generate an API Key: In your App Store Connect account, create a new API key.
We support both Team and Individual .p8 API Keys.
Enter a custom name to easily identify the project in the future.
If you already have an API Key and are unsure of its type
Check the key ID format:
- Team API Key: 10 characters
- Individual API Key: 12 characters
Add the API Key to ASO.dev
Section titled “Add the API Key to ASO.dev”You can add the key by:
- Dragging and dropping it into the project creation window.
- Manually entering the key details.
- Selecting the key file from your device using the icon button.

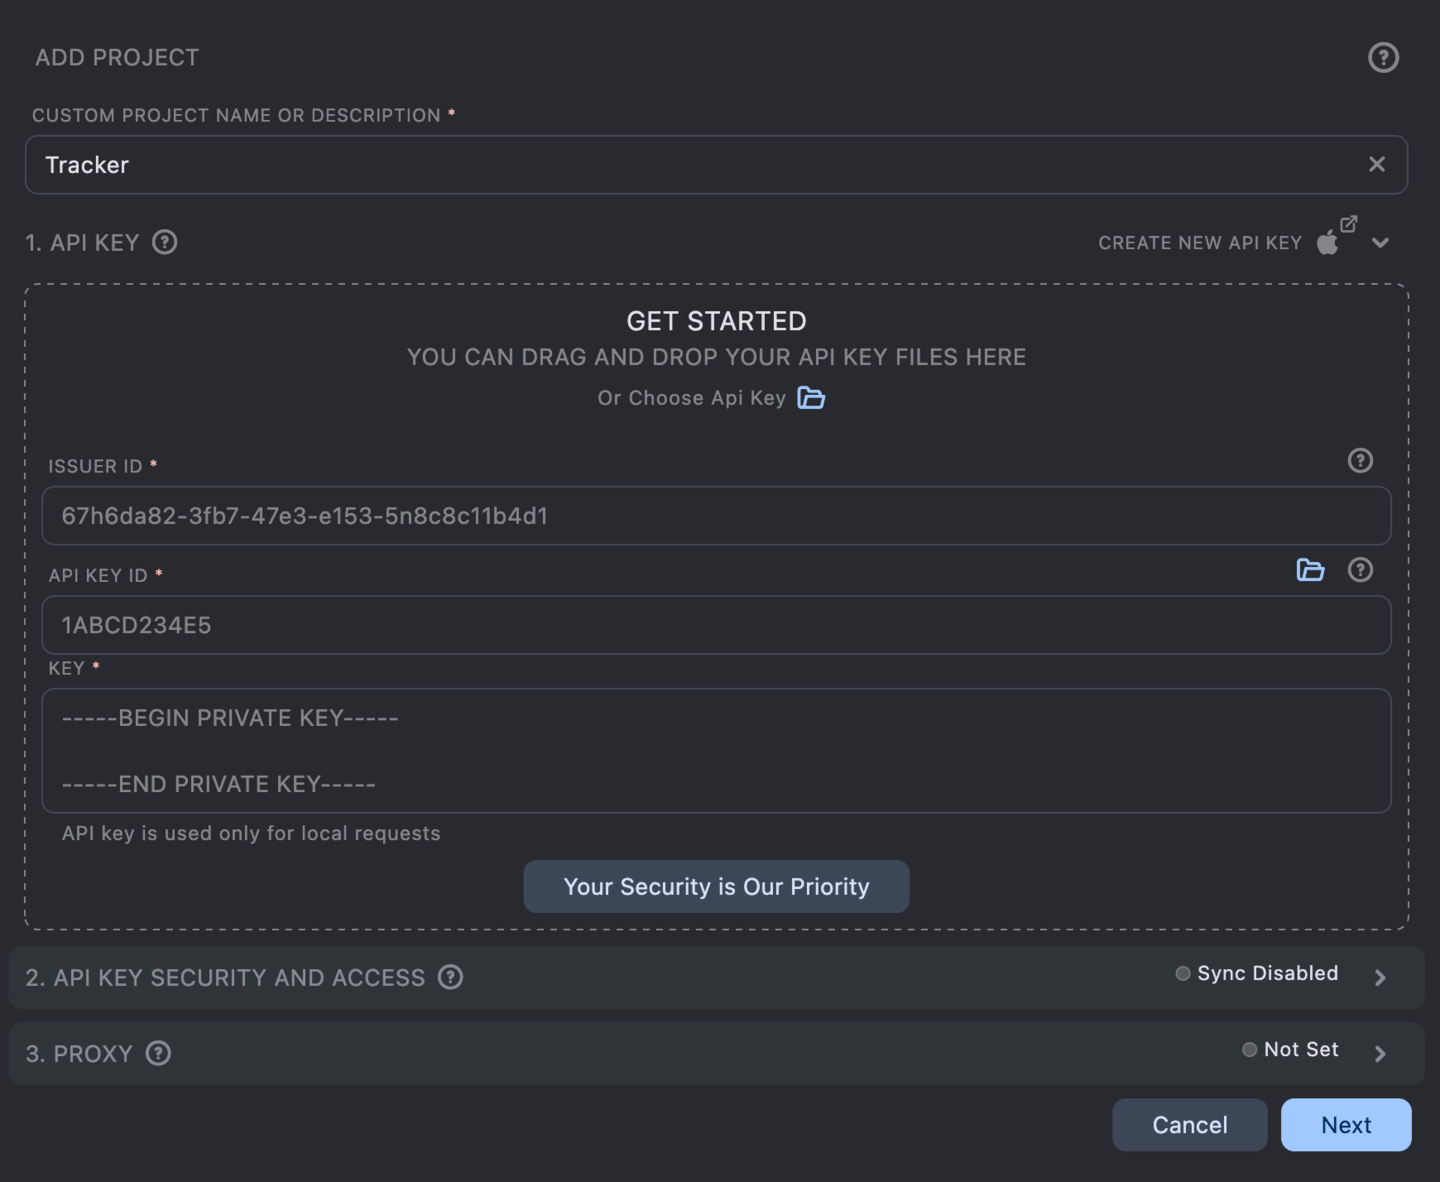
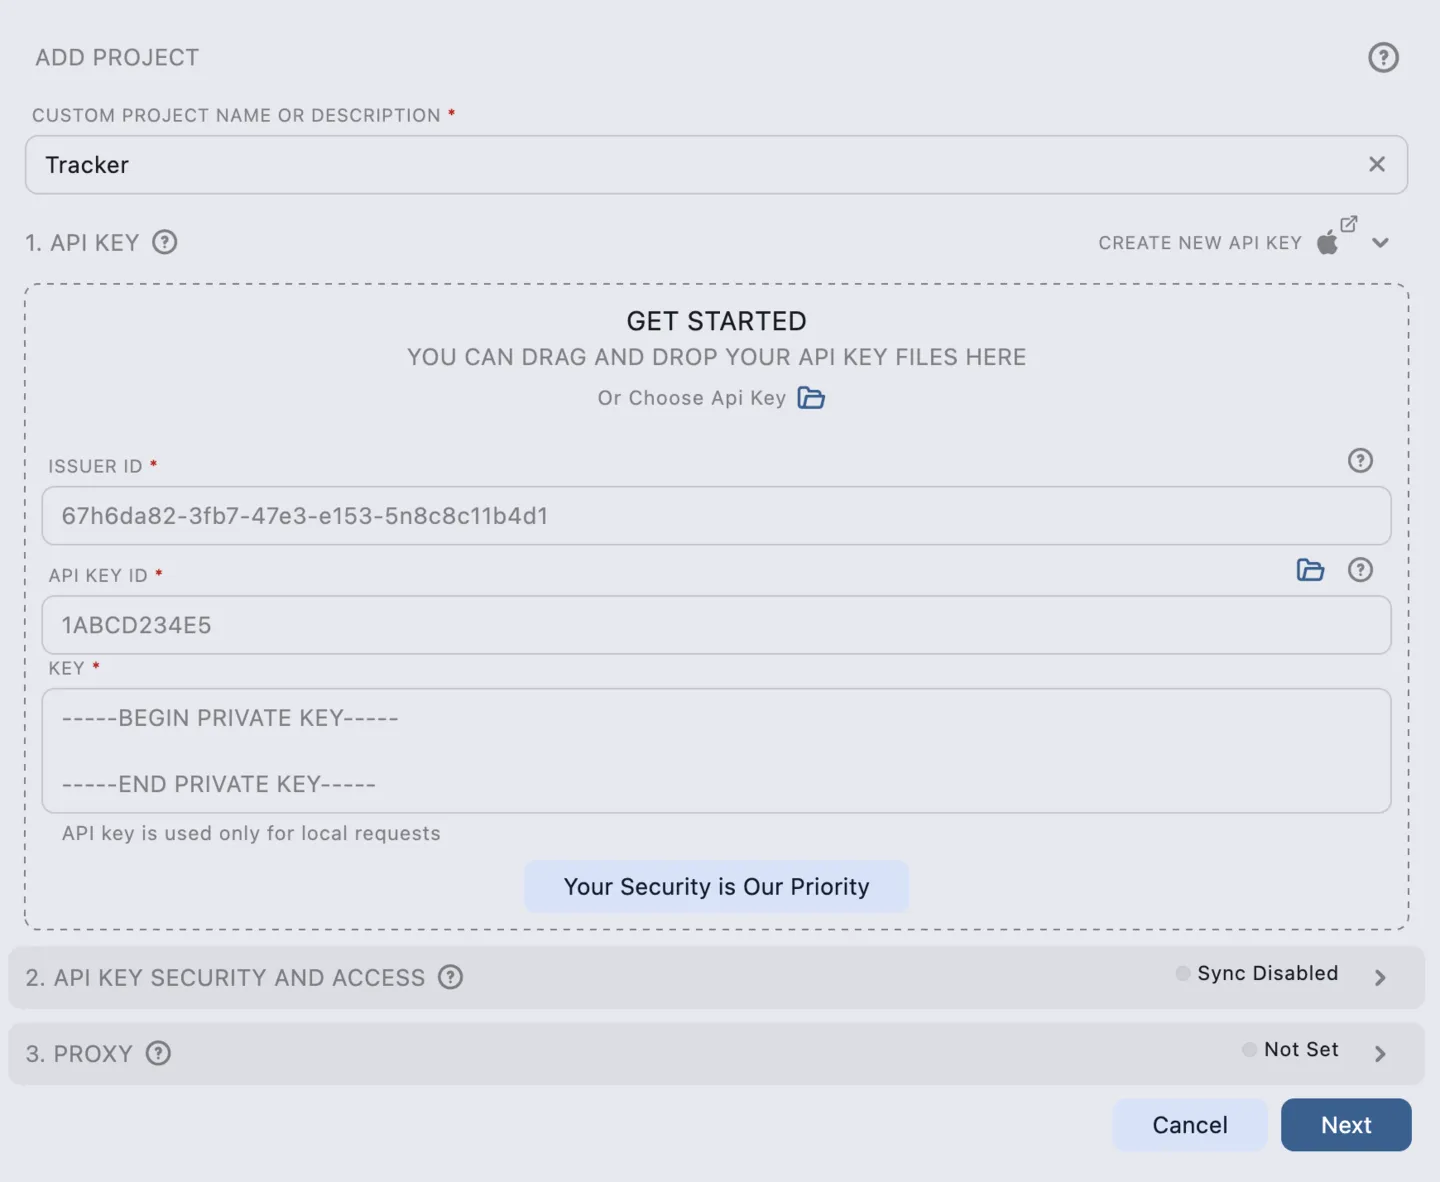
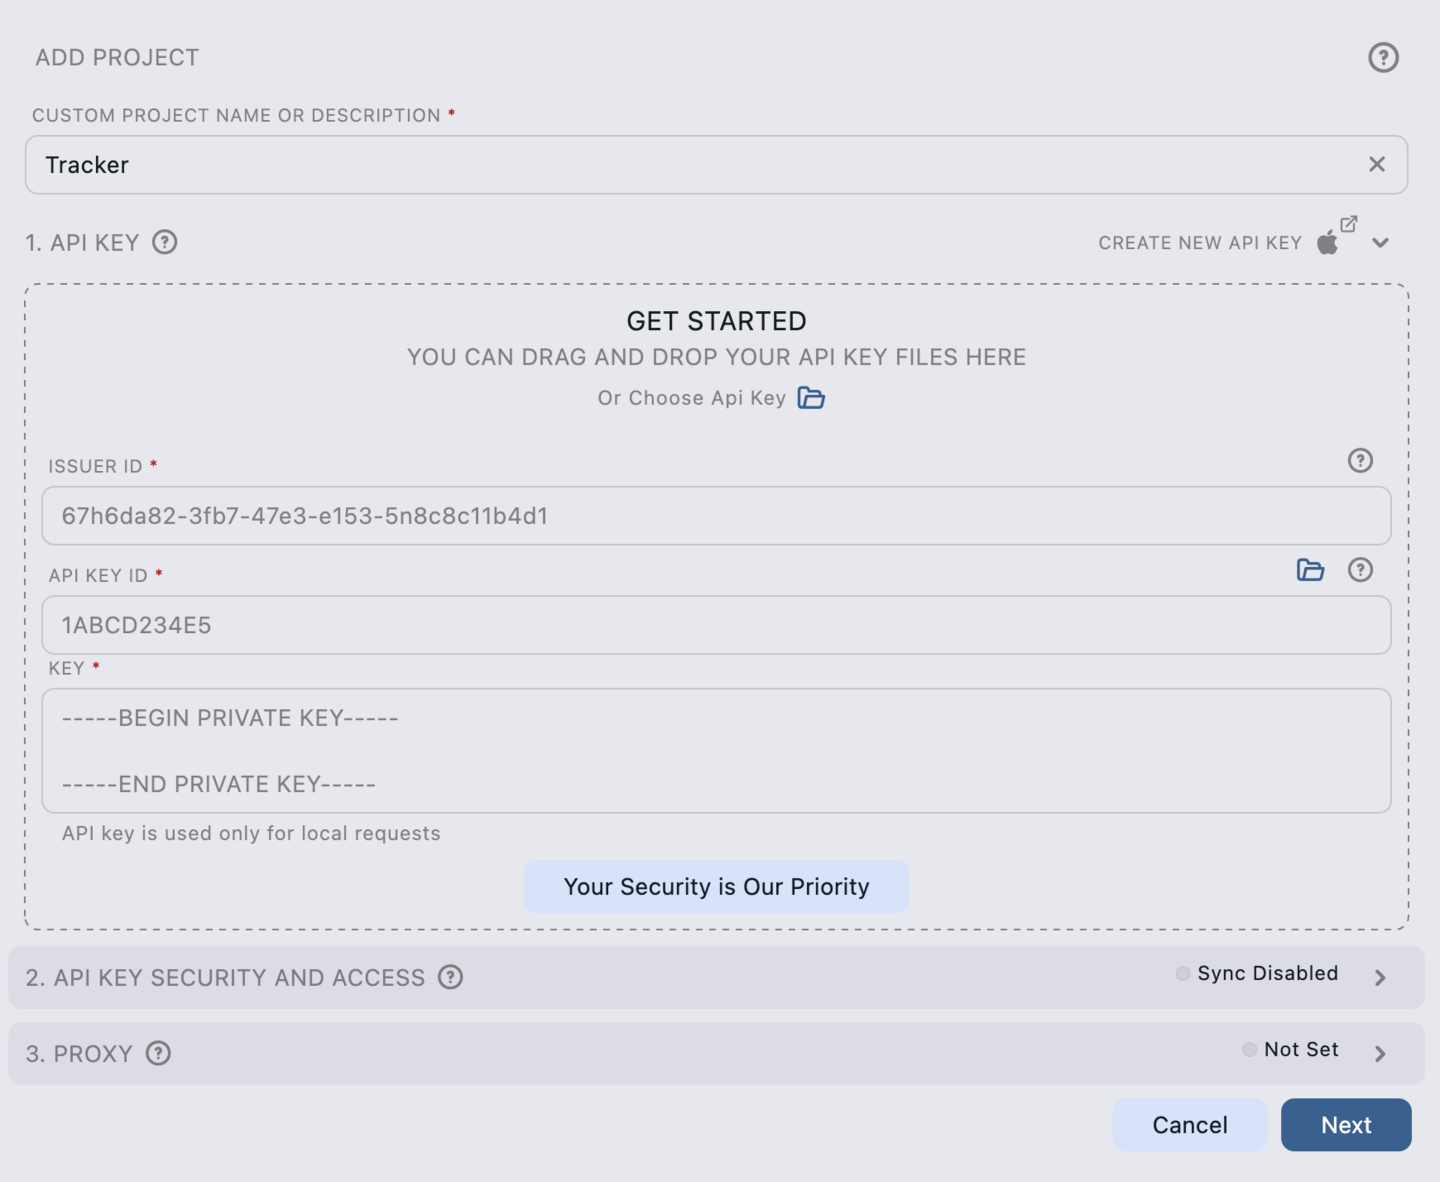
Fill in the Required Identifier
Section titled “Fill in the Required Identifier”- For Team API Keys: Enter the Issuer ID.
- For Individual API Keys: Enter the Issuer ID or Developer ID.
The Issuer/Developer ID is a unique identifier generated for each App Store Connect account.
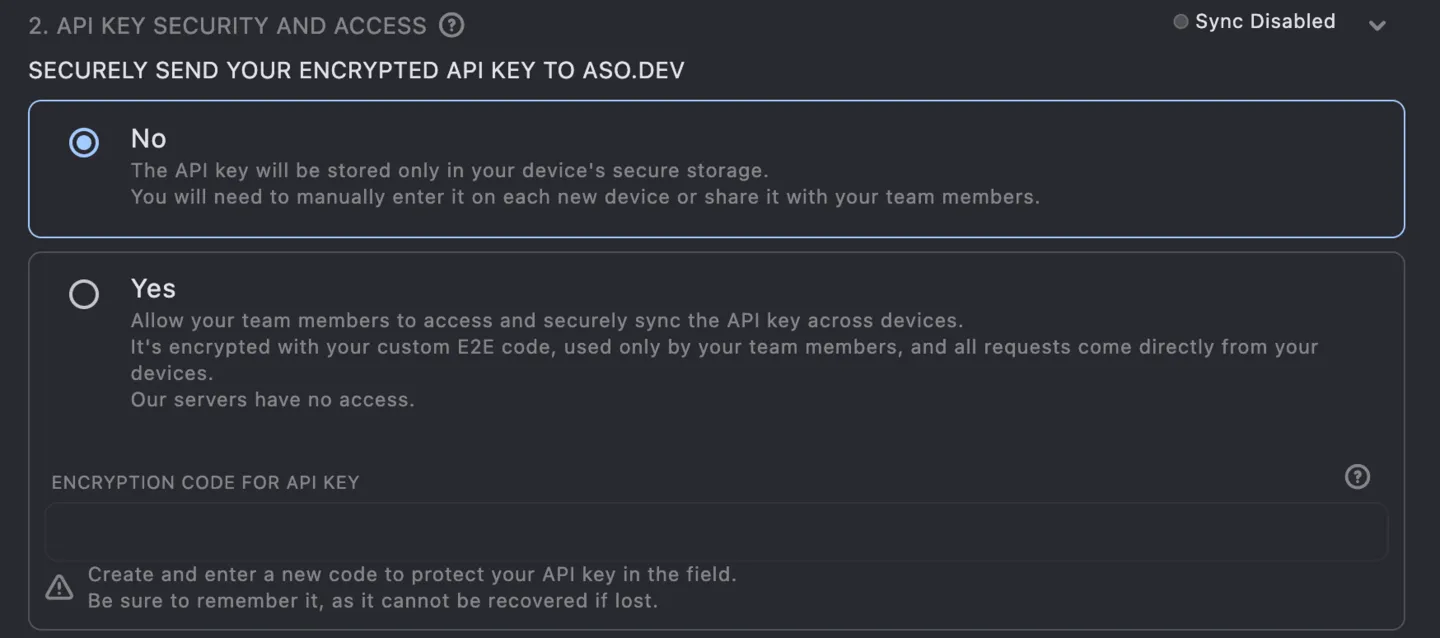
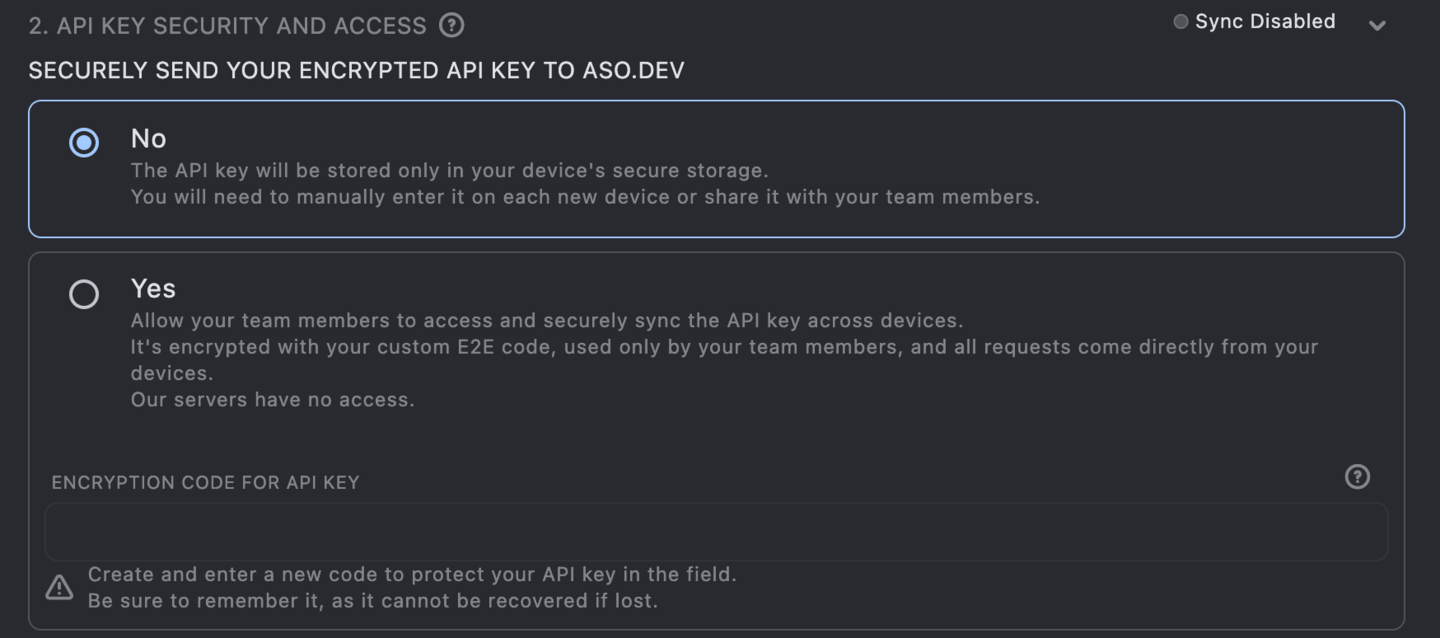
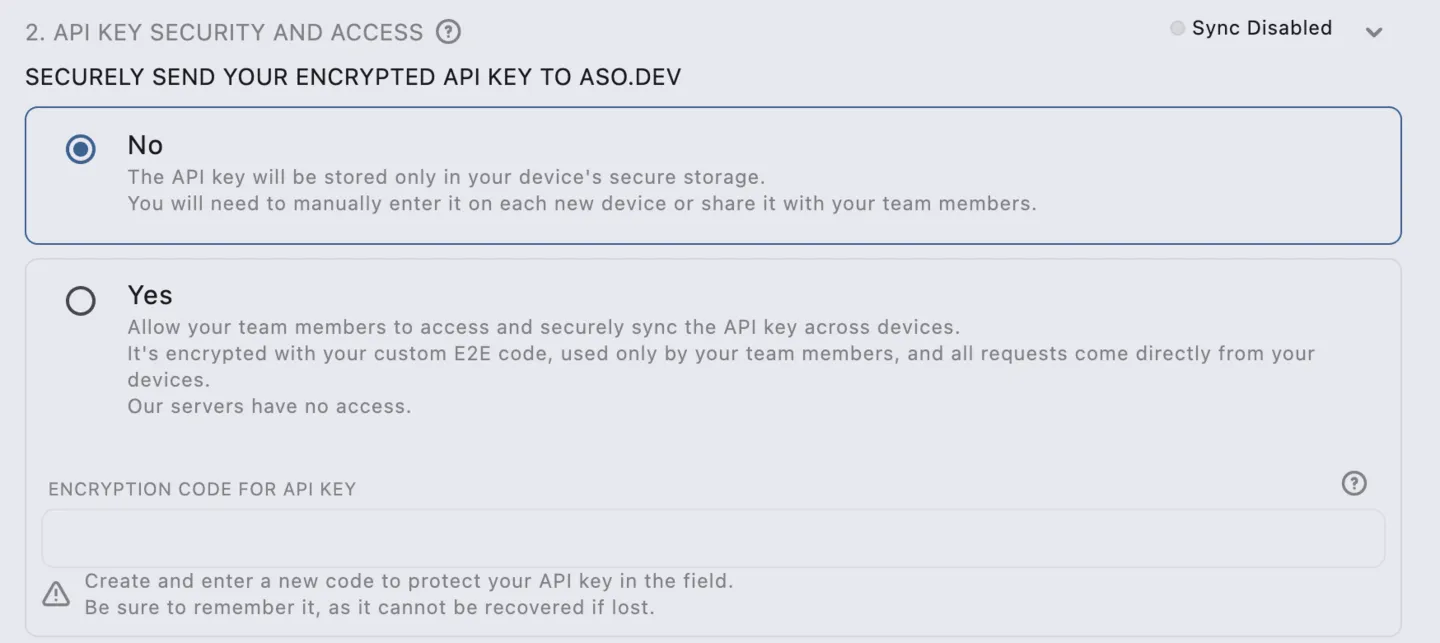
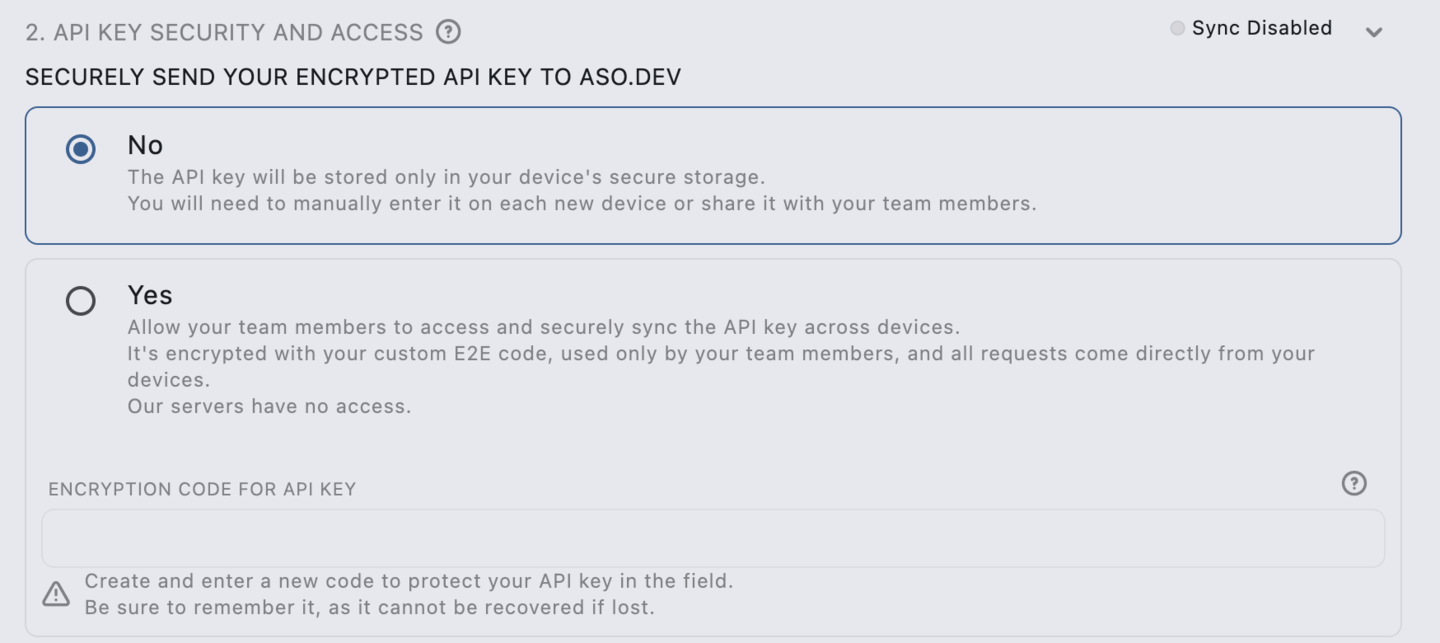
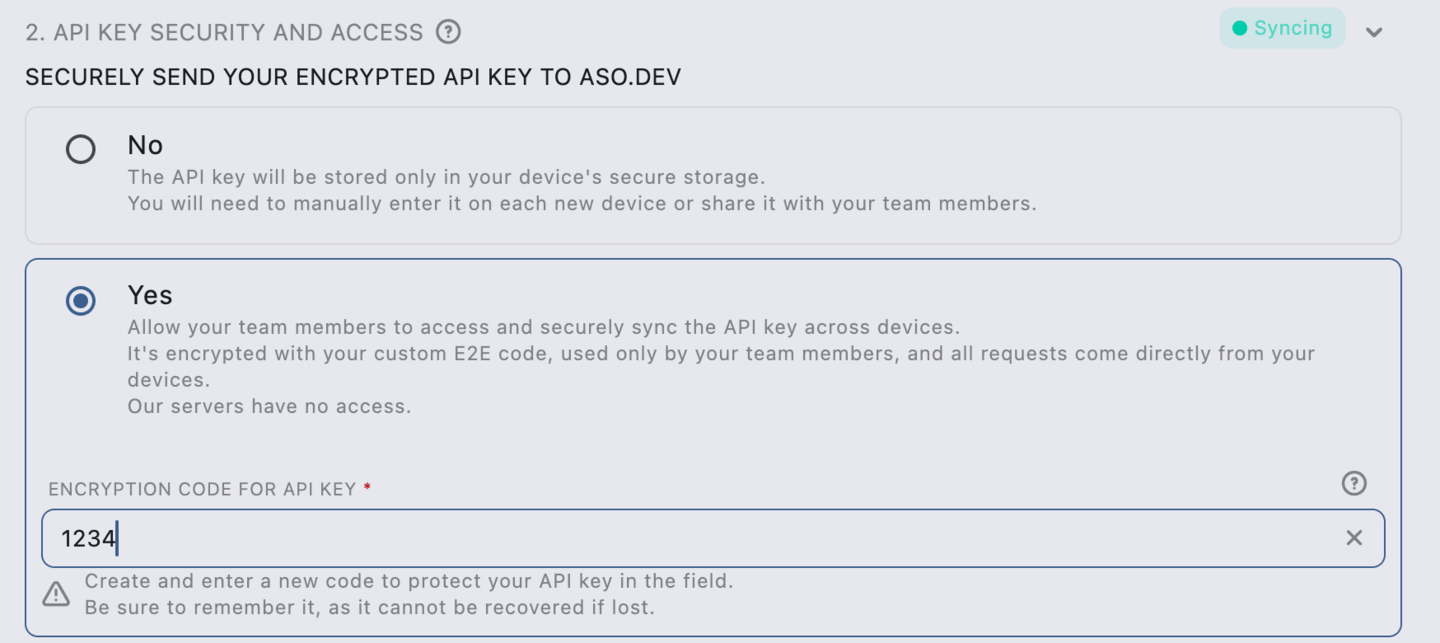
Set Up API Key Synchronization Preferences
Section titled “Set Up API Key Synchronization Preferences”Choose whether to enable synchronization for your API keys across projects:
- Sync OFF → No encryption code needed; the key stays local.
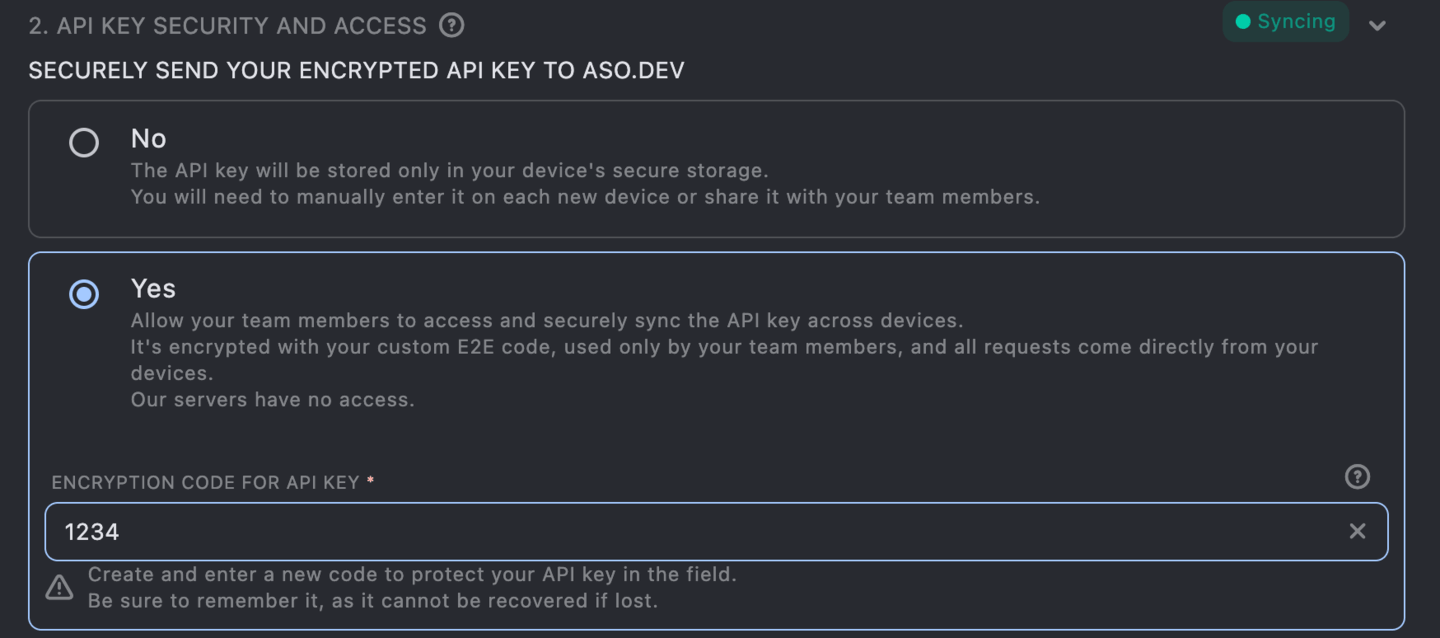
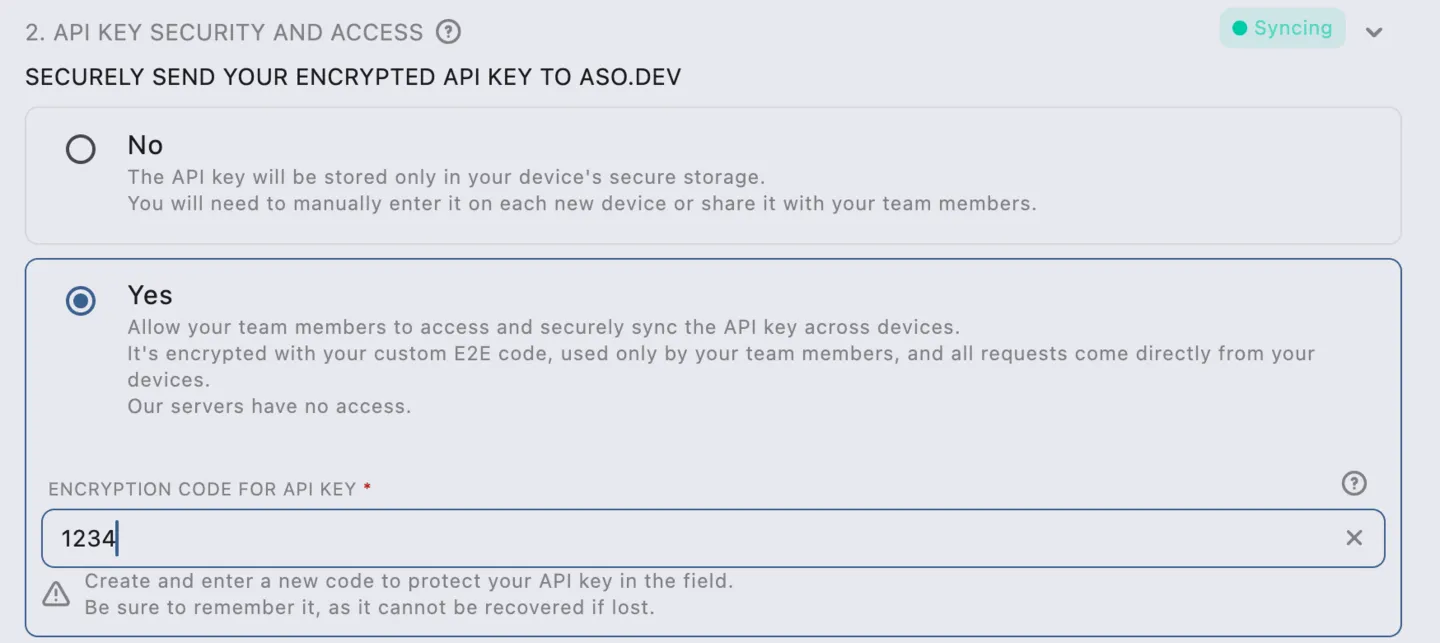
- Sync ON → Requires an Encryption Code for secure sharing across devices in encrypted format.
Encryption Code
Section titled “Encryption Code”For encryption purposes: The API key (.p8) is securely encrypted.
Encryption code is required for shared projects or to access the same project on another device or via a shared link.
Enter the encryption code on the project card to restore access to the project.
The encryption code is only visible on the project owner’s device where it was originally created.
To view it, open the project editor screen on that device.
If you lose access to the device and forget the encryption code, it cannot be reset-you will need to create a new project.

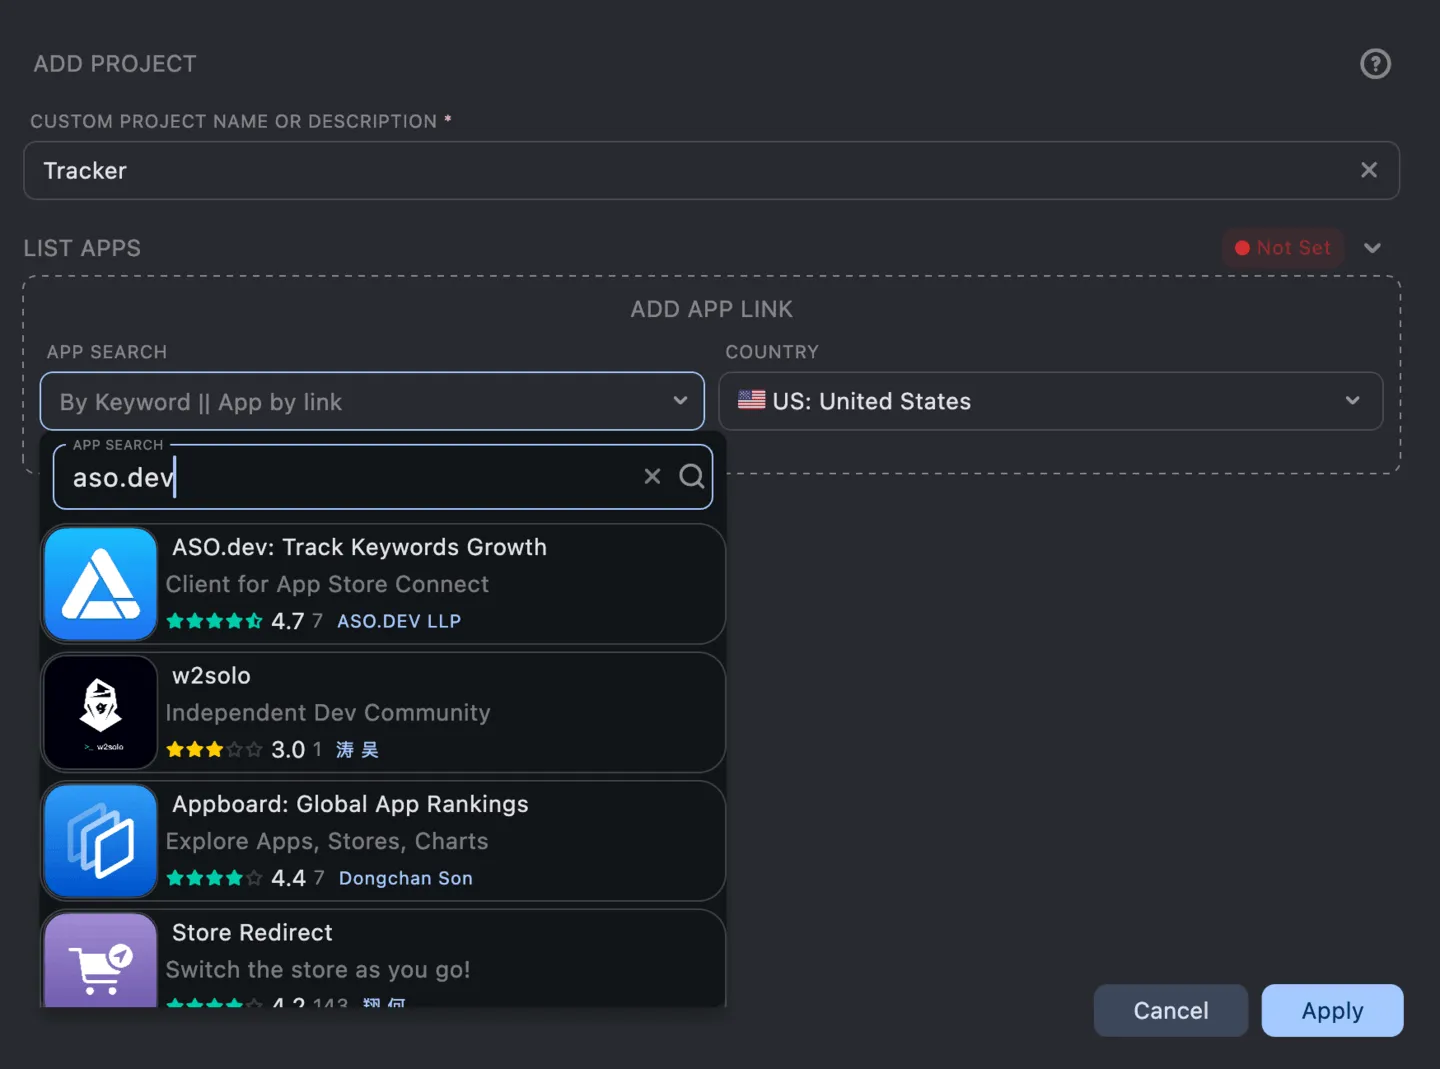
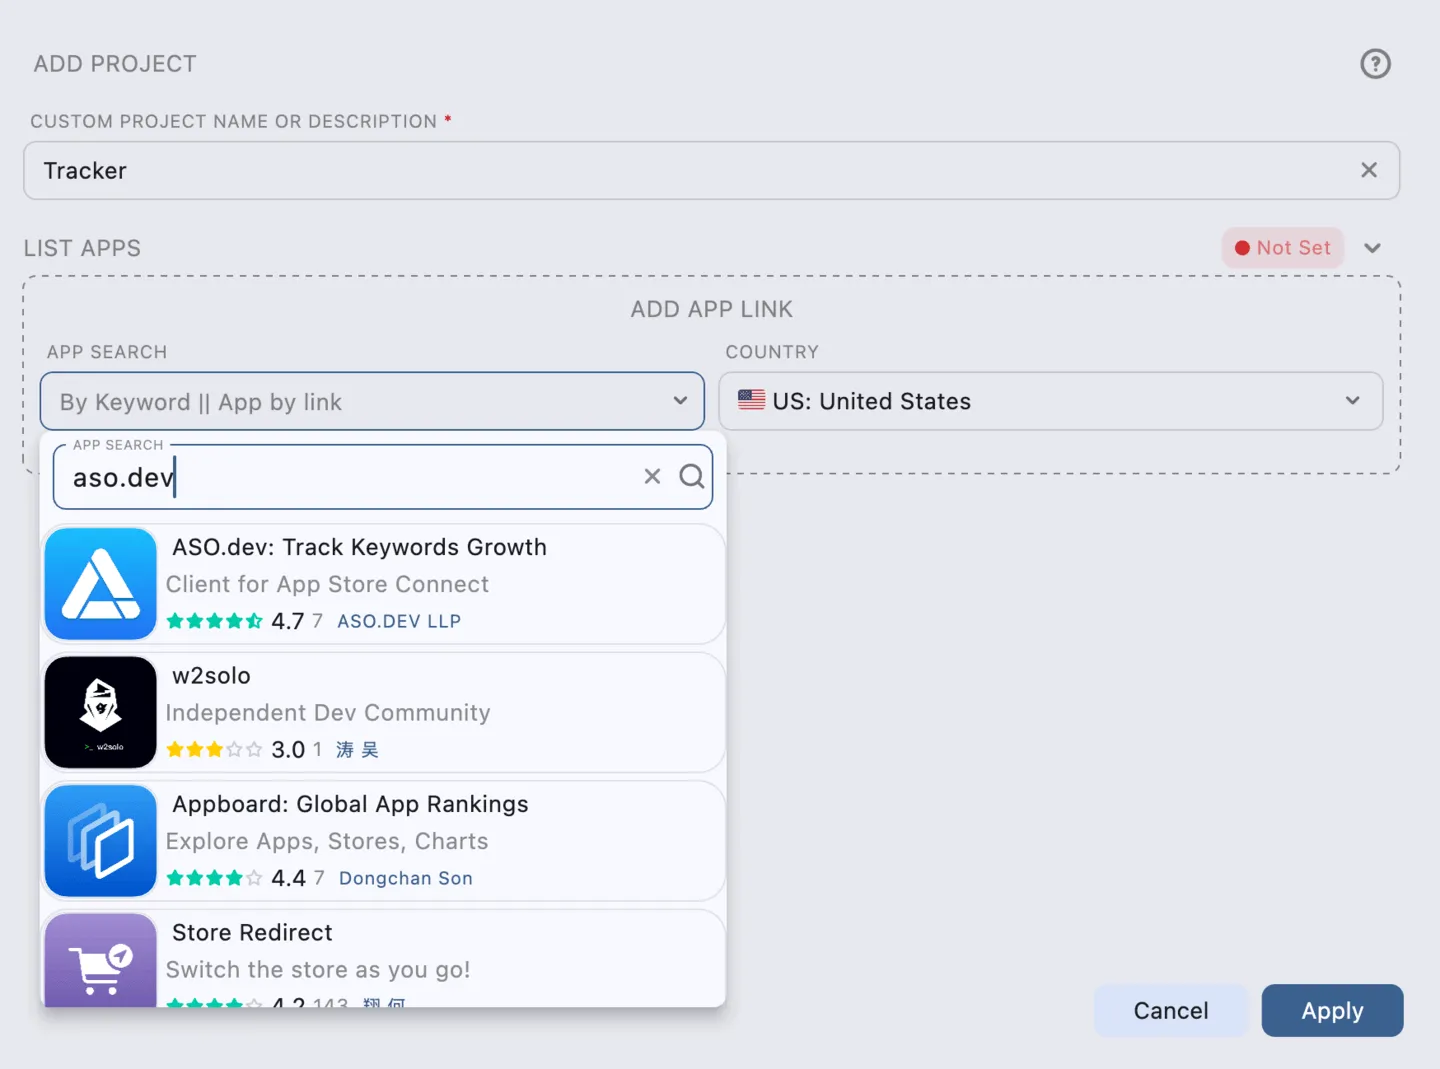
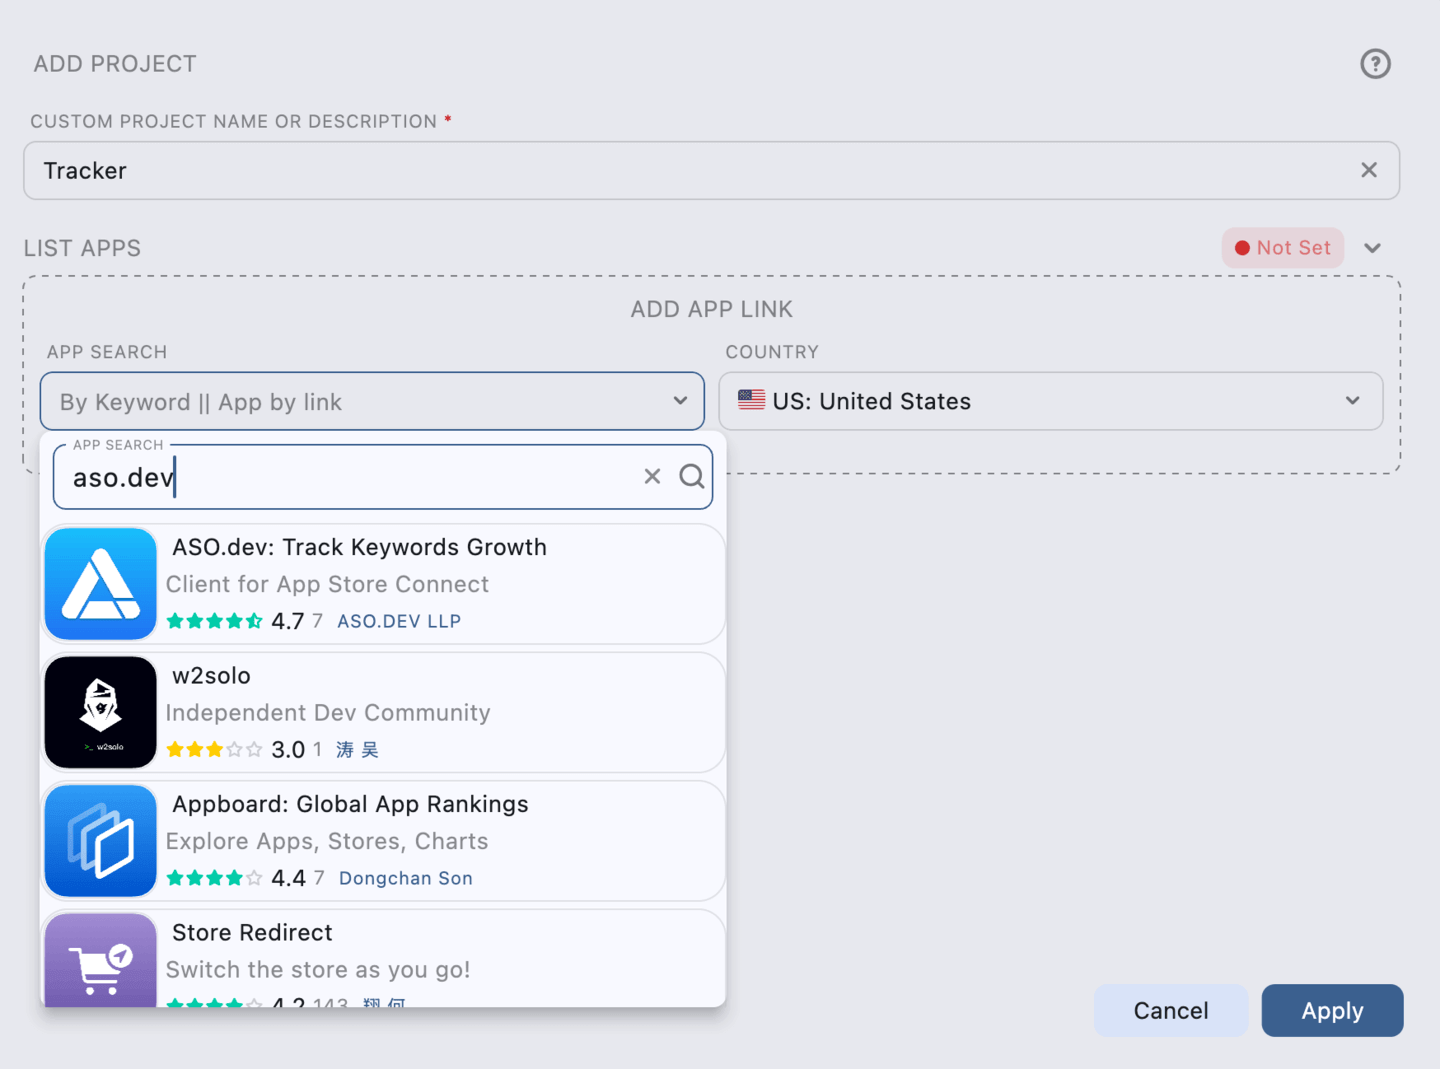
Project without an API Key
Section titled “Project without an API Key”- Enter a custom name to easily identify the project in the future.
- Add the apps you want to include in the project by link, ID, or name.

Available only for the Pro and Marketing memberships.
SOCKS5 & SOCKS5H proxies have shown successful testing results.
HTTP proxies are not supported in ASO.dev-unsafe and can expose your IP.
Apple may temporarily block or restrict access to a developer account if it detects suspicious activity, such as frequent requests from different IP addresses.
If one account sends requests from different IP addresses, it may appear as an attempt to hack the account.
Moreover, if multiple accounts use the same IP address, Apple may link all developer accounts together by this IP address.
This is especially critical if the accounts belong to different legal entities or are separated into different accounts for further app sales.
In this case, if one account encounters issues, sanctions may affect others as well.
Using a proxy can reduce such risks, as API requests will always originate from a single stable IP address tied to a specific proxy server.
Who needs this?
- Developers with multiple Apple Developer Accounts.
- Agencies working with different clients.
- Large companies with distributed teams.
- Owners of separate legal entities or projects requiring distinct IPs.
Advantages of using a proxy server:
- Security - protection from Apple blocks and restrictions.
- Confidentiality - separation of accounts and prevention of linking between them.
- One IP for all employees - when working with a distributed team.
- Simultaneous work with multiple accounts - all API requests will not originate from the user’s IP but will use a separate IP address for each project, reducing the risk of blocks.
Proxy types
ASO.dev supports only SOCKS5 & SOCKS5H proxies.
- Mobile proxies: Disguised as regular iPhone/iPad users. The safest but most expensive option. Apple almost never blocks mobile IPs as they are dynamic.
- Residential proxies: Look like regular user IPs and are less prone to blocking. Issued by internet providers, not data centers.
- Data center proxies: The cheapest, often used for mass scraping. Apple identifies them as bot traffic and blocks them more often, increasing the risk of an IP ban.
Best proxy types for working with Apple
| Proxy Type | Security | Speed | Price | Suitable for Apple? |
|---|---|---|---|---|
| Residential | ✔️ High | ⚡ Medium | 💲💲💲 | ✔️ Yes |
| Mobile | ✅ Very High | ⚡ Medium | 💲💲💲💲 | ✅ Yes (best option) |
| Data Center | ❌ Low | 🚀 High | 💲 | ❌ No (high risk of ban) |
Setting Up a Proxy Server
Section titled “Setting Up a Proxy Server”How to set up a proxy server:
- Create a proxy server:
- Choose a reliable proxy provider.
- Set up a proxy server with a static IP address.
- Add a proxy server to ASO.dev:
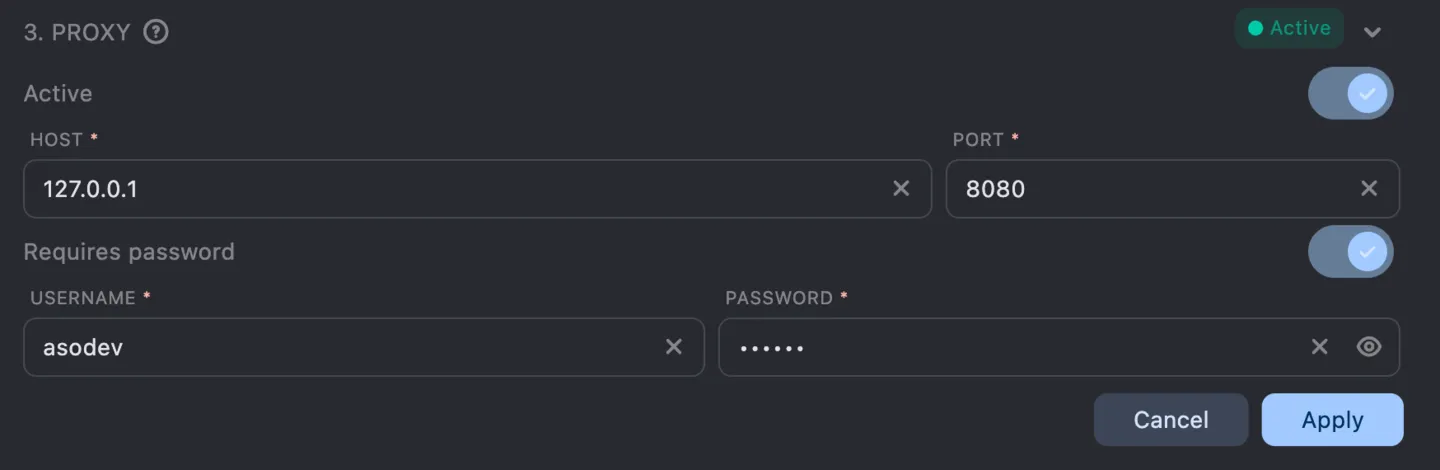


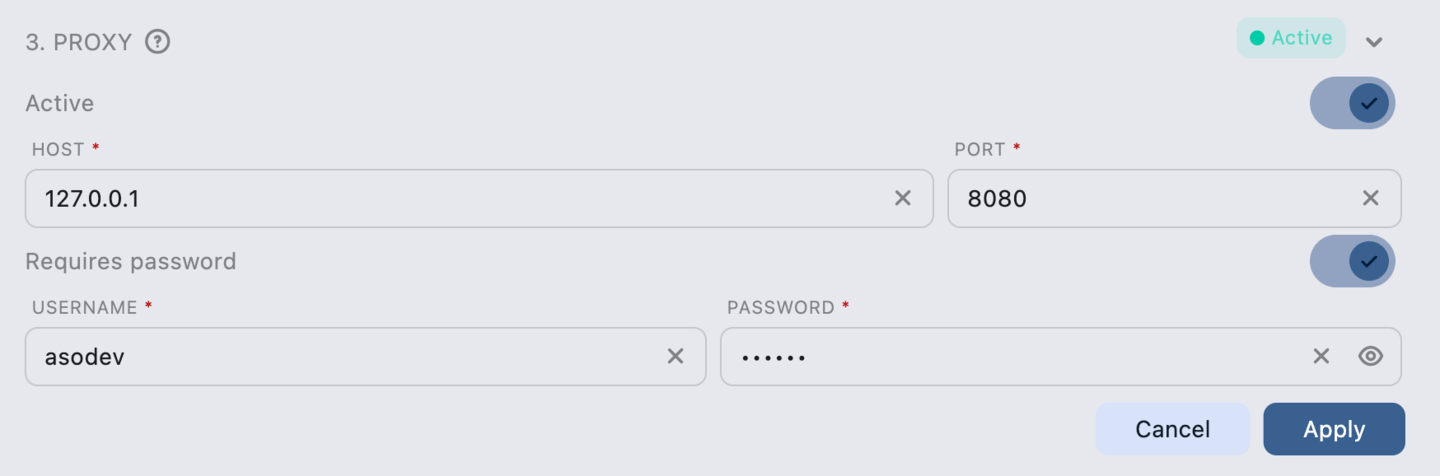
- In the project settings, enter the proxy server IP address and port.
- If necessary, enter the username and password for the proxy server.
- Save the settings.
The Check button tests the connection to the proxy server to ensure it is set up correctly. If successful, it displays the current IP address as seen through the proxy.
When checking the IP address, two methods are used, each called in turn:
- Server request - checks the IP address from the ASO.dev server.
- Third-party system - checks the IP address using the third-party service ipify API.
If the check fails, you will see an error message.
The connection errored: Connection refused This indicates an error which most likely cannot be solved by the library.
You can set a proxy server for each project individually.
You can enable the mandatory use of a proxy server for all projects in the Settings.
A proxy server is only required for working with App Store Connect via API Key and is not used for other ASO.dev functions, such as ASO analyses.
Interface Elements
Section titled “Interface Elements”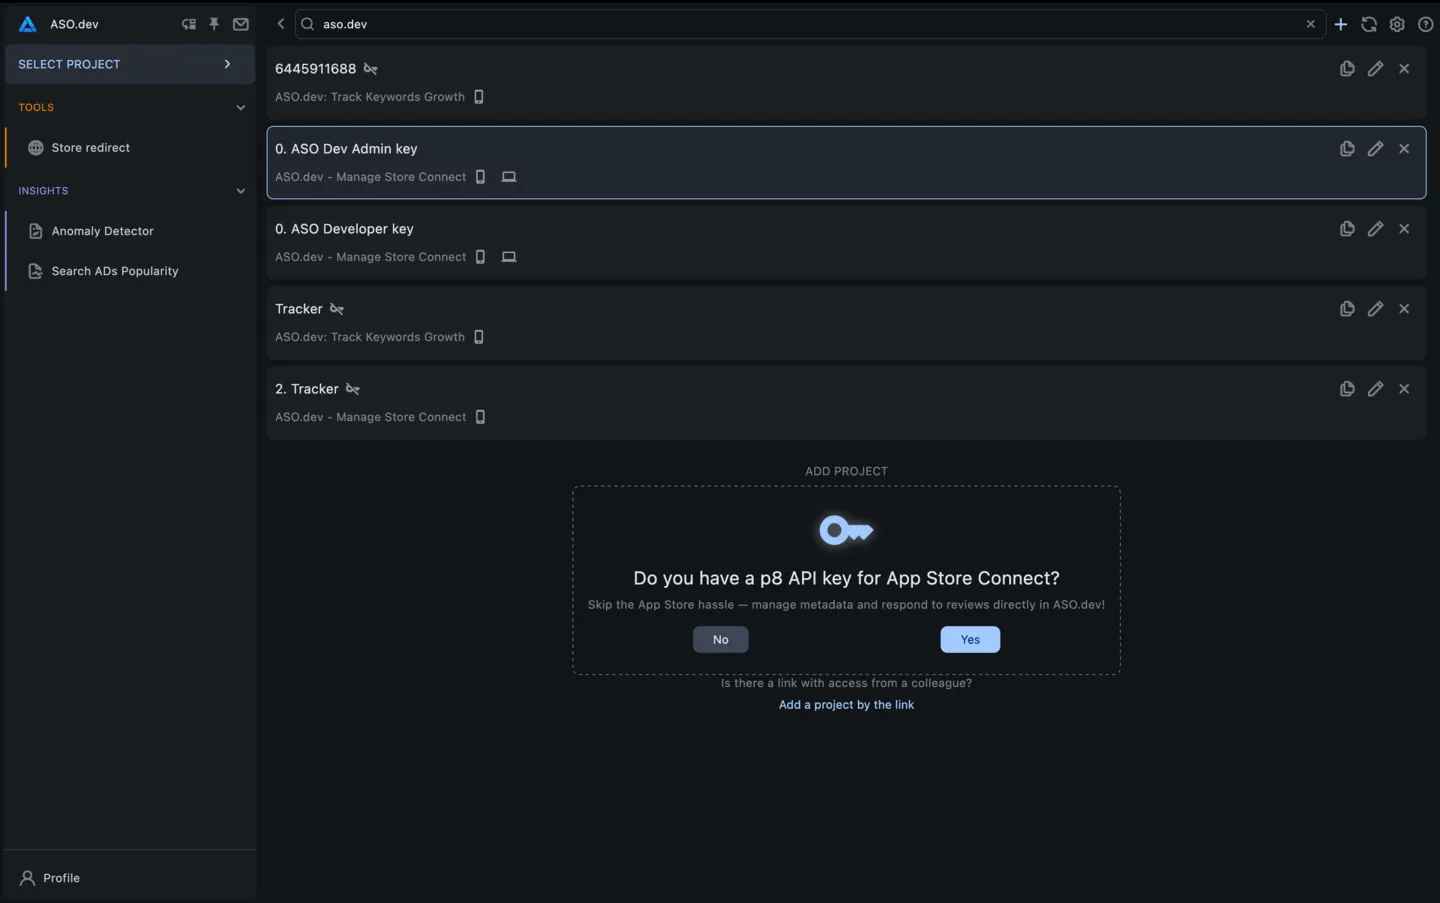
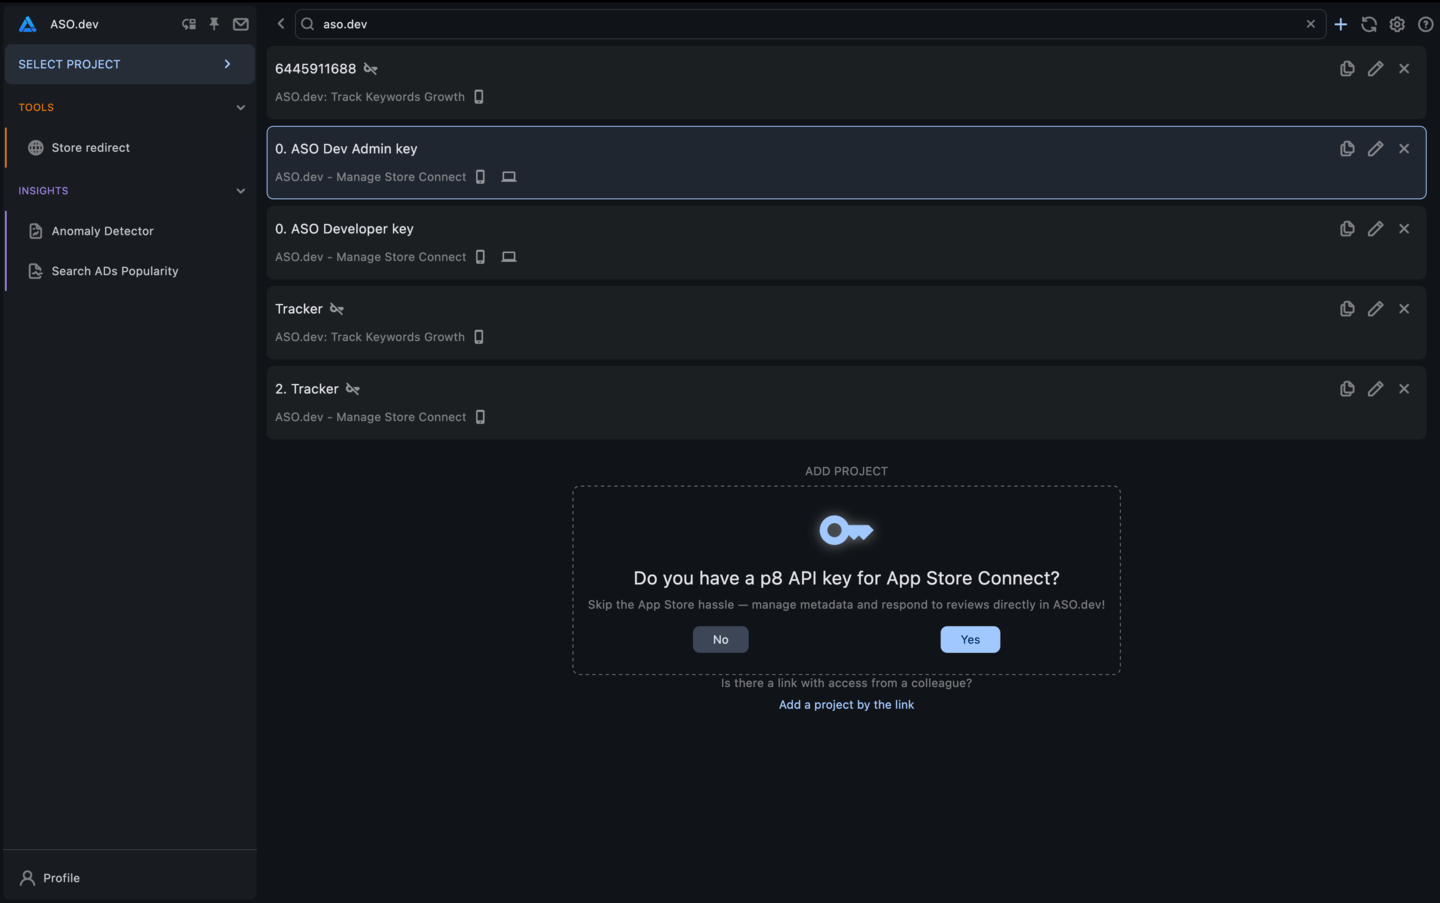
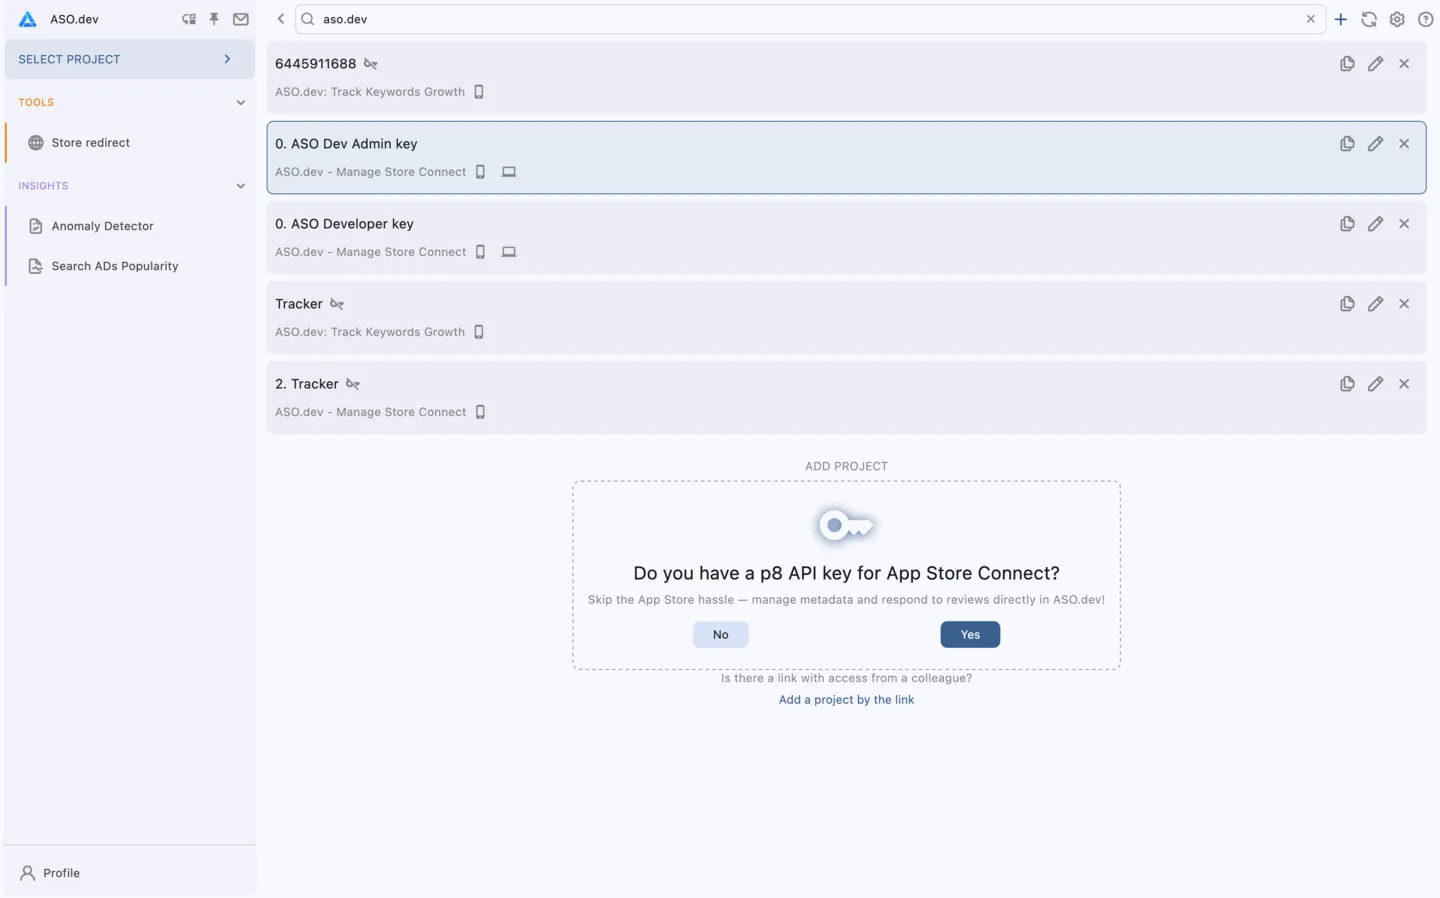
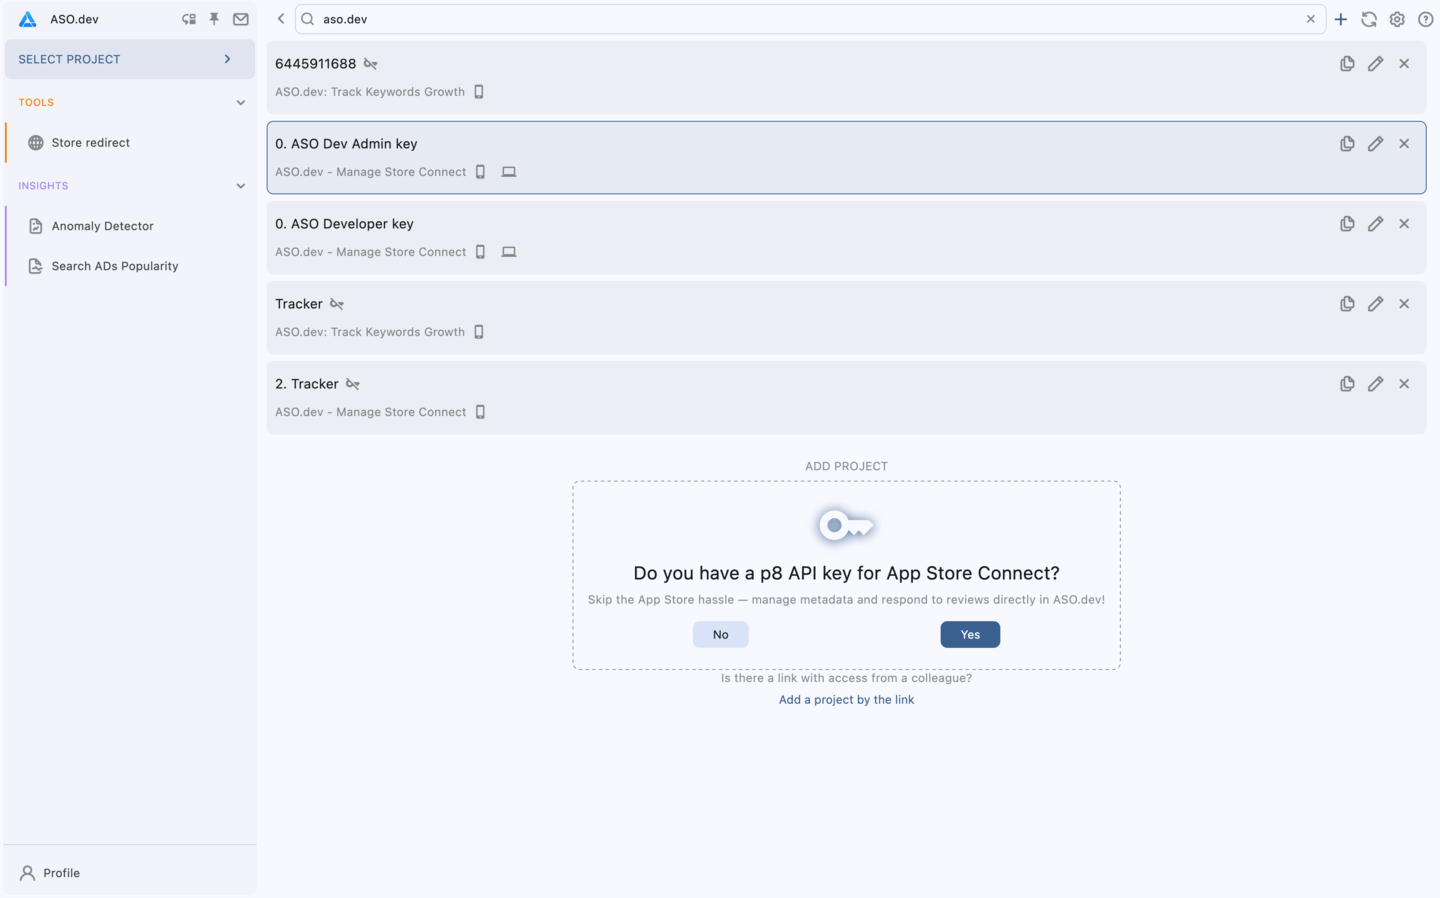
At the top of the screen, you will see:
- A field to search for a project
- Button to create a new project
- Button to refresh data and force synchronization with the server
- Settings button
- Button to access help information
Each project card displays:
- Project name
- List of apps in the project
- Platform of each app (iOS, iPadOS, macOS, tvOS, watchOS, visionOS) in the project
- Button to duplicate the project
- Button to edit the project
- Button to delete the project
A blue border around the project card indicates that the project is selected.


A red border around the project card indicates that an encryption code is required to access the project.
Navigation
Section titled “Navigation”Clicking on a project card will take you to the list of apps in the project.
To open the project list, click on the ASO.dev logo at the top of the side menu.
To switch projects, click on the name of the current project at the top of the side menu, located above the app list, and then click the double arrow .
Search
Section titled “Search”To quickly find a project, use the search bar at the top of the screen.
Search is performed by project name, app name, or app ID within the project.
Creation
Section titled “Creation”To create a new project, click the button in the top-right corner of the screen.
Choose the project type: with or without an API key.
Fill in all required fields and click the Save button.
Cloning
Section titled “Cloning”To clone a project, click the button in the top-right corner of the project card.
A project creation window will open, where you can modify the parameters of the new project before creating its copy.
Fill in all required fields and click the Save button.
Editing
Section titled “Editing”To edit a project, click the button in the top-right corner of the project card.
You can change the project name, add or remove apps from the project, replace the API key, and modify proxy server settings.
Deletion
Section titled “Deletion”To delete a project, click the button in the top-right corner of the project card.
Encryption Code
Section titled “Encryption Code”When opening a project on another device for the first time, you will be prompted to enter the encryption code.
If someone has shared access to the project with you, you can obtain the encryption code from them.
If you forget the encryption code, you can recover it on the device where the project was created.
If you lose access to the device and forget the encryption code, it cannot be recovered - you will need to create a new project.
Access Provided by Another User
Section titled “Access Provided by Another User”Indicates that access to the project was provided by another user.