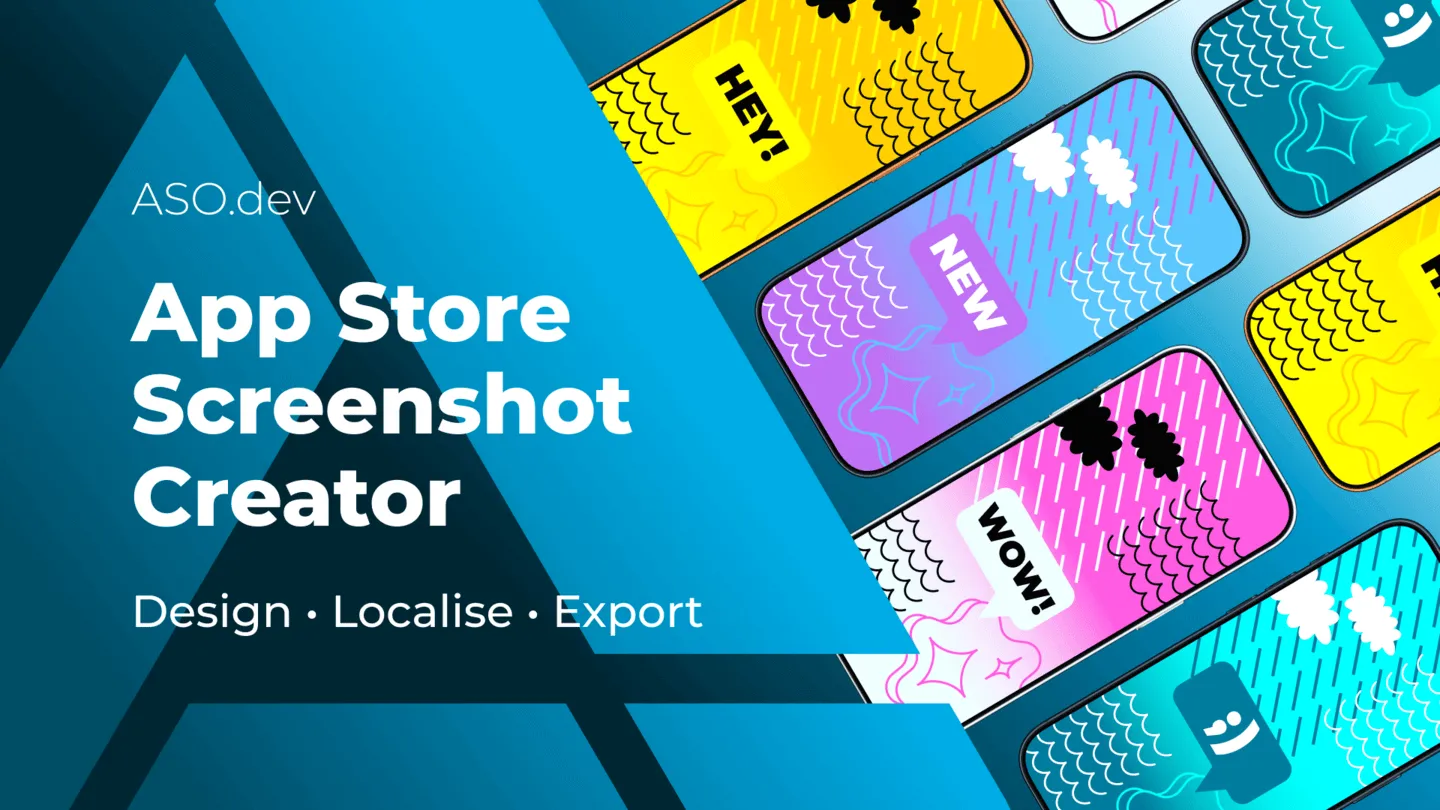
App Store Screenshot Template (Figma): Free & Editable
Are you a developer or ASO specialist who needs to update screenshots but has never worked with Figma?
This guide is for you.
We’ll walk through the template step-by-step: what’s where, what you can change, and what’s best left alone.
No designer jargon - just practical instructions.

What You’ll Need
Section titled “What You’ll Need”- Free Figma account
- Our template - download from Figma Community
- Screenshots of your app - PNG or JPG from simulator/device
Important: you do NOT need design skills. The template is ready - you just replace the content.
Getting Started
Section titled “Getting Started”Open the Template
Section titled “Open the Template”- Go to the template link in Figma Community
- Click “Duplicate” in the top right corner
- The template will be copied to your files - you can now edit it
What You’ll See
Section titled “What You’ll See”After opening the file, you’ll see several pages (Pages) on the left:
- iPhone - ready-made screenshot layouts for iPhone (work here)
- Elements - technical components (don’t touch these yet)
- # - main page with instructions (ignore this)
iPhone
Section titled “iPhone”Start with the iPhone page.
On this page you’ll see:
- Important - key information to get started
- How-to - quick instructions
- INSERT YOUR SCREENSHOTS HERE - area to paste your screenshots
- PREVIEW - preview of your screenshots in device frames (how they’ll look on devices for review)
- Template 6.9” #01, #02, #03 - ready-made templates for 6.9”
- Template 6.5” #01, #02, #03 - ready-made templates for 6.5”
You’ll see several ready-made templates (Template 6.9” #01, #02, #03 and Template 6.5” #01, #02, #03) with different visual styles.
Each template contains 11 ready-made screenshots (slices) with correct naming (iPhone-6-9-V01-00, iPhone-6-9-V01-01, etc.).
Slices are ordered left to right - this will be the order of screenshots in the App Store.
Important: The App Store accepts a maximum of 10 screenshots for one device type per language.
Before exporting, delete one extra slice (first or last in the group) - see “Removing Unnecessary Slices” section.
Choose the Right Size
Section titled “Choose the Right Size”On the page you’ll see ◰ sections (frames) with template names.
Two iPhone sizes are available:
- 6.5” iPhone - for iPhone 14 Pro, 15, 15 Pro, 17 Air (most common)
- 6.9” iPhone - for iPhone 15 Pro Max, 16 Pro Max, 17 Pro Max
Click on the ◰ section with the template name to select it for work.
Template Anatomy
Section titled “Template Anatomy”Each ◰ section is used for one screenshot set. It consists of:
- 11 slices with screenshot names. Used for export and show the boundary of each screenshot.
- 11 ⌗ frames with screenshot names, containing all elements.
- A ◇ component with background image (Background) - colored background behind the device, which can be changed.
Each frame ⌗ contains all screenshot elements:
- Text
- Graphics overlaid on the screenshot (Marketing Overlay)
- Area with your app screenshot (Screenshot Content) Device layer ⬚ in the device frame.
In the Device layer ⬚ - iPhone ◇ component (color can be changed).
Some screenshots include a Close-Up layer - an enlarged portion of the same screenshot used to emphasize details.
Device Frame
Section titled “Device Frame”What it is: iPhone image with screen inside.
What you can change: device color, size and position (just maintain screen proportions).
Screenshot Content
Section titled “Screenshot Content”What it is: area where your app screenshot is inserted
What you can change: the image in INSERT YOUR SCREENSHOTS HERE (see “Replacing Screenshot” section).
Don’t touch: area dimensions (already fitted to the screen).
Marketing Overlay
Section titled “Marketing Overlay”What it is: text and graphics overlaid on the screenshot.
What you can change: text, colors, style (see sections below).
Don’t touch: structure (if you don’t understand what it is).
Background
Section titled “Background”What it is: colored background behind the device.
What you can change: via Variables select one of 6 ready-made options ◆, and customize brand colors via Variables (see “Working with Colors” section).
Advanced: you can create your own unique background on the Elements page and set each screen to its own color.
Basic Operations
Section titled “Basic Operations”Replacing App Screenshot
Section titled “Replacing App Screenshot”Task: insert your own screenshot instead of the demo image.
Step-by-step instructions:
- Go to the iPhone page.
- Find the frame named INSERT YOUR SCREENSHOTS HERE.
- Select the demo screenshot layer
- Click on the image area
- Replace the image using one of these methods:
Method 1: Drag and drop PNG/JPG directly onto the screenshot area
Method 2: Select the image → right panel → Fill → Image → Choose Image - Check the scale The image should fully fill the screen
If cropped incorrectly: click on the image → right-click → Fill container or Fit
Important: the screenshot should have the correct aspect ratio (preferably 1290×2796 for 6.9”).
Use iOS simulator or a real device.
Resizing and Repositioning Elements
Section titled “Resizing and Repositioning Elements”Task: change the size and position of elements within the screenshot.
Step-by-step instructions:
- Select the element you want to change:
- Click on the element on the canvas
- Or find it in the left Layers panel.
- Resize:
- Drag the corners to enlarge or reduce
- Move to adjust position
Important: maintain proportions to avoid distorting the image.
Working with Close-Up images in Figma
Section titled “Working with Close-Up images in Figma”Task: adjust the Close-Up image in Figma - replace it, remove it, change its position, or modify its frame.
Step-by-step instructions
- Delete the Close-Up
- In the left Layers panel, find the group named CloseUp
- Select it
- Press Delete
That’s it - the enlarged image will be removed.
- Add your own image
- Drag any image from your computer into the Close-Up area in Figma
- Or use File → Place image
- Change the Close-Up frame size
- Click the entire Close-Up element
- Drag a corner to increase or decrease its size
- Move the image or change its scale
- Double-click the image inside the Close-Up to select the image layer separately
- To show a different area of the screenshot, drag the image to the desired position
- To resize while preserving proportions, drag a corner and hold Shift
- Add a border around the Close-Up
- With the image selected, enable Stroke in the right panel
- Choose stroke thickness and color
- Optionally set rounded corners
Changing Text
Section titled “Changing Text”Task: change placeholder text to marketing copy on the screenshot.
Step-by-step instructions:
- Select text layer:
- Click on the text you want to change or find it in the left Layers panel.
- Edit text:
- Double-click on the text
- Enter new text
- Press Esc or click away
What to do if text doesn’t fit:
- Try shortening the phrase
- Change font size in the right panel (Text → Size)
- Reduce letter spacing (Text → Letter spacing)
Important: if using non-Latin characters - check that the font supports them.
Text recommendations:
- For feature descriptions, use short phrases (3–7 words). Brevity improves readability.
- Headline - one sentence, maximum 2 lines; key message in the first 1–3 words.
- Make CTAs slightly larger and higher contrast. Use short verbs: “Try”, “Install”, “Buy”.
- Leave width buffer for localizations - some languages are longer than English.
- Test visibility in reduced preview and actual device sizes; if cropped - shorten text or reduce font size.
- Maintain high text-to-background contrast (aim for WCAG AA) and avoid small decorative fonts for main messaging.
Choosing a Different Ready-Made Background
Section titled “Choosing a Different Ready-Made Background”Each template has 6 ready-made ◆ background options.
Find the Choose your background layer in the left Layers panel at the bottom of each template
Open the Design / Variants panel
- Right panel → Design tab
- Find the Variants or Instance section
In the Choose scheme dropdown menu, select one of 6 ◆ background options
The background will change instantly
Changing Device Color
Section titled “Changing Device Color”The template includes several iPhone 17 colors, including the new orange.
How to switch:
- Select the device frame ⌗
- Click on the iPhone frame (Device layer ⬚) or find it in the left Layers panel. It contains a ◇ component with iPhone 17 Pro MAX.
Find Variant ◆ in the right panel:
- Properties → Instance section
- You’ll see a dropdown list with available device colors
Select color:
- Click on the desired ◆ option
- The device will instantly change color
Important: if Variant ◆ didn’t appear, you selected the wrong layer.
Look for the ⬚ Device component group in the layer structure, and within it the ◇ component with iPhone 17 Pro MAX.
Working with Colors and Themes
Section titled “Working with Colors and Themes”The template uses Figma Variables - think of them as variables.
Change a variable → all elements using it update automatically.
Opening the Variables Panel
Section titled “Opening the Variables Panel”To change colors in themes you’ll need the Variables panel.
How to open Variables via search:
- Open Search:
- Click the Actions button (lightning icon) in the top bar
- Or keyboard shortcut: Cmd/Ctrl + K
- Find Variables
- Type
Variablesin the search bar - Click on Toggle Variables
- Type
The Variables panel will open.
Changing Colors in Light/Dark Themes
Section titled “Changing Colors in Light/Dark Themes”Task: customize your brand colors for Light or Dark theme.
Open the Variables panel (see section above)
In the Variables panel, find a variable, for example:
- Primary Color - main accent color
- Background - background color
- Text - text color
Next to each name in the columns under the theme name (Light or Dark) you’ll see colored squares with color and code.
Colors can be changed separately for all themes.
All elements using this variable will update automatically.
Pro tip: if you don’t know your brand color HEX codes, get them from:
- Your app’s design system
- CSS/SwiftUI code (e.g.,
Color(hex: "FF5500")) - Figma file with your app design
Change Color
Section titled “Change Color”- Click on the colored square
- Color picker will open
- Select a new color or enter HEX code (e.g.,
#FF5500) - Color will update instantly
Switching Theme (Light/Dark)
Section titled “Switching Theme (Light/Dark)”Quick method via Appearance:
If you want to change:
- one frame ⌗: click on the screenshot frame ⌗
- entire page: click on empty canvas space or select the iPhone page in the Pages panel
Open the Appearance panel:
- Right Design panel → find the Appearance section
- Or use the Apply variable mode button
Switch theme:
- Click on Apply variable mode (variables icon)
- Select Theme switcher
- Choose mode: Light or Dark
All colors will update automatically:
- Background, text, accents - everything switches instantly
- If you selected the entire page - all frames ⌗ on it will change theme
💡 Quick path: Design panel → Apply variable mode → Theme switcher → select theme
Removing Unnecessary Screenshots (Slices)
Section titled “Removing Unnecessary Screenshots (Slices)”Task: remove extra screenshot before export.
App Store accepts maximum 10 screenshots.
Select extra slice:
We recommend removing the first (iPhone-6-*-V0*-00) if you’re not using it as a cover, or the last (iPhone-6-*-V0*-10).
Delete:
Press Delete or Backspace on keyboard
You’ll have 10 screenshots left - ready for export
Important: only delete the Slice, not individual elements inside the frame ⌗.
Exporting Finished Screenshots
Section titled “Exporting Finished Screenshots”After you’ve inserted your screenshots and configured text, you need to export the finished images if you’re not going to localize screenshots.
- If you need to export all screenshots for one template select the ◰ section with the template name for export, if you only need to export one template (e.g., Template 6.9” #01).
- You can select multiple: hold Shift and click on section ◰ names.
- To export all screenshots in all sizes and templates - don’t select anything on the page.
Important: Figma will save files with slice names.
For subsequent upload to App Store Connect via ASO.dev, you don’t need to change slice names.
Exporting Any Selected Element
Section titled “Exporting Any Selected Element”Select element for export
You can select multiple: hold Shift and click on elements
Open Export panel: right panel → scroll down → Export section
Add export settings:
- Click + (plus) next to Export
- Select format: PNG (recommended for App Store)
- Size: 1x (sizes are already correct)
Export:
- Click Export [element name]
- Choose folder to save
- File will be saved with element name
Elements
Section titled “Elements”Go to the Elements page for advanced customization.
The Elements page contains additional components for customization:
Device Frames
Section titled “Device Frames”Devices Mockups - mockups of various devices (iPhone in different sizes, iPad, MacBook).
Not recommended to change the components themselves, but you can copy them for use on the iPhone page if you need to show a screenshot on other devices.
Decorative Text and Elements
Section titled “Decorative Text and Elements”Decorative Text Templates - ready-made text templates with effects for highlighting features or awards, so you don’t have to create them from scratch.
Design Elements - decorative elements for styling screenshots:
- Patterns and textures
- Arrows and pointers
- Stars and badges
- Clouds, stars, bursts
- Callout and accent elements
How to use:
- Go to the Elements page
- Copy the desired element (Ctrl/Cmd + C)
- Return to the iPhone page
- Paste the element (Ctrl/Cmd + V) into the desired frame ⌗
- Customize for your needs (color, size, position)
Working with Background Images
Section titled “Working with Background Images”Long Backgrounds - these are 6 ready-made ◆ background options available in Choose scheme.
You can add new ◆ background variants in the component:
- On the Elements page
- Click in the component to add as a new ◆ variant
- Specify name
- Change color, gradient, background images to your taste
- New background will appear in the Choose scheme dropdown menu
Advanced Techniques
Section titled “Advanced Techniques”Copying Styles Between Elements
Section titled “Copying Styles Between Elements”Task: apply the formatting of one text to another.
Select source element:
Click on text or object with the style you want to copy
Copy style:
Press Ctrl/Cmd + Alt/Option + C
Select target element:
Click on text you want to apply the style to
Paste style:
Press Ctrl/Cmd + Alt/Option + V
What’s applied: color, font size, weight, shadows, effects.
Changing Layer Order
Section titled “Changing Layer Order”Task: move text above or below other elements.
Select layer:
Click on element
Change order in Layers panel:
- Drag layer up or down in the left panel
- Higher layers = displayed on top
Keyboard shortcuts:
- Ctrl/Cmd + ] - move layer up
- Ctrl/Cmd + [ - move layer down
Locking Layers
Section titled “Locking Layers”Task: protect elements from accidental changes.
Locked layer cannot be edited or moved
Select layer (e.g., Device Frame).
Lock one of these ways:
- Right-click → Lock
- Press Ctrl/Cmd + Shift + L
- In Layers panel - lock icon appears - layer is locked for editing
Unlocking one of these ways:
- Press Ctrl/Cmd + Shift + L again
- Right-click → Unlock
- In Layers panel lock disappears - layer is available for editing again
Recommendation: lock Device Frame and Background if you’re only changing content - this way nothing gets accidentally moved.
Hiding and Managing Layers
Section titled “Hiding and Managing Layers”Task: temporarily hide elements or create alternative ◆ background variants. Select the layer you want to hide
Hide layer:
- Click the eye icon next to the layer in the Layers panel
- Or press Ctrl/Cmd + Shift + H
Layer will become invisible but remain in the file
Show layer again:
- Click on the empty space where the eye was in the Layers panel
- Or select the layer and press Ctrl/Cmd + Shift + H
Pro tip: hide the standard background and set each screenshot to its own color.
Set Custom Background Color for Each Screen
Section titled “Set Custom Background Color for Each Screen”Task: set a unique background for each screenshot.
Find the frame ⌗ of the desired screenshot:
In the Layers panel on the iPhone page, expand the desired frame ⌗ (e.g., iPhone-6-9-V01-03)
Select the component with the screenshot name in Layers - this is the component you can recolor.
Change color directly:
- Right panel → Fill section
- Click on the colored square
- Select new color in picker, enter HEX code, choose gradient or image.
- Change opacity from 0 to 100%.
Background color will change only for this screenshot.
Other screenshots will keep their settings.
Repeat for other screenshots with different colors as needed.
Pinning Element Position
Section titled “Pinning Element Position”Task: fix an element on the canvas so it doesn’t scroll during navigation.
Select element (e.g., important reference or palette)
Pin to canvas: Right-click → Pin to canvas
Element will remain visible when scrolling
Unpin: Right-click → Unpin from canvas
Note: pinning only works for Figma navigation, doesn’t affect export.
Pre-Export Checklist
Section titled “Pre-Export Checklist”Before final export, verify:
- All screenshots replaced with current ones from your app
- Texts checked for typos and feature accuracy
- Colors match your app’s brand
- Frames ⌗ named correctly for auto-upload to ASO.dev
- Order of ⌗ frames matches desired App Store order
What’s Next
Section titled “What’s Next”Localize to other languages - use the localization plugin for automatic translation
Upload to ASO.dev - it will automatically distribute files by locales and devices
Set up A/B tests - create new app page variants and test conversion
Direct ad traffic from Apple Search Ads campaigns to new marketing pages (CPP) - this helps increase conversion and precisely promote new features.
Do I need to pay for Figma?
No. The free plan is sufficient for working with templates.
Can I edit the template on iPad?
Yes, via Figma Mobile App, but functionality is limited. We recommend desktop.
What if I don’t have app screenshots?
Use iOS simulator or a real device. For Android - use an emulator.
How do I add my own font?
Upload font to Figma: Text menu → Font → Upload font. Then apply to text layers.
I broke something - how do I restore it?
Duplicate the template again from Figma Community. Your copy doesn’t affect the original.